Nothing says cuddly like a kitty on the couch, even if that kitty is a pillow!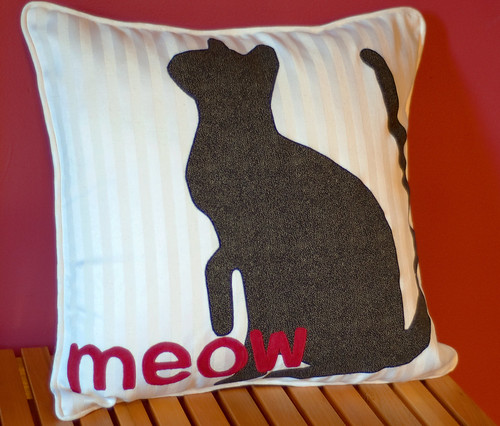
I drew up a diagram so you can make one of these too! Actually, there are a lot of ways you could use this diagram to make this pillow (painting, stenciling, reverse applique, regular applique, silkscreen, etc.) So if you have an idea, download either the regular or reverse diagram (sized for an 18 inch square pillow) and have at it! If you want to make one like mine, keep on reading for both a sew and no-sew version...
Cat pillow diagram
Cat pillow diagram REVERSE
Applique Cat Pillow (Sewing Version)
Supplies:
18 inch pillow form
Fabric:
3/4 yard for background
1/2 yard (or a piece at least 15 inches x 20 inches) for cat
1/4 yard (or a piece at least 4 inches by 12 inches) for letters
fabric as necessary to finish back, make piping, etc. (will vary based on how you finish the pillow)
Supplies:
Sewable Iron-on adhesive (I used HeatnBond Lite)
Coordinating thread
Closures for pillow as desired (buttons, zipper, etc)
Printer, tape, and a pencil
1) Cut 19 inch square from front background fabric.
2) Print out the cat pillow diagram REVERSE. The final pillow is 18 inches square, so you will have to print in sections and tape together. Every printer is different, but you will probably have to set "page scaling" at zero, select "tile pages," and set an overlap, such as 1/2 inch. (If you have troubles, send me a message and I'll try to talk you through it!)
3) Trace the cat onto the paper side of the iron-on adhesive. Cut out leaving a wide border around pencil lines. Repeat for each letter.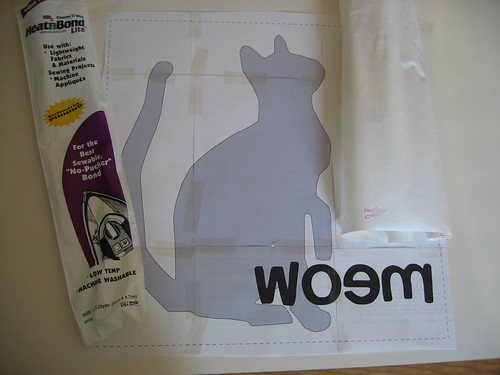
4) Place the traced cat iron-on adhesive on the WRONG side of fabric for cat. Press with iron to activate adhesive as directed on package. (from my package: silk setting, 1-2 seconds) Let cool, and then cut out cat fabric on pencil line.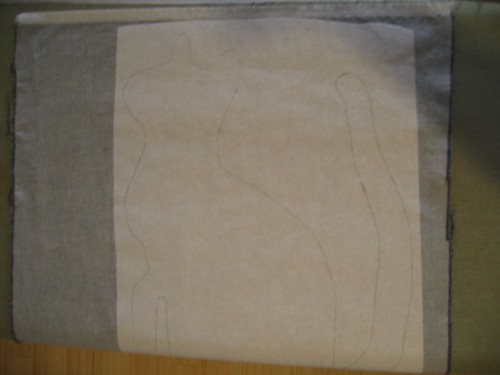
5) Remove paper from cat iron-on. Using diagram as a guide, place cat iron-on on background fabric. Press iron to adhere as directed on package.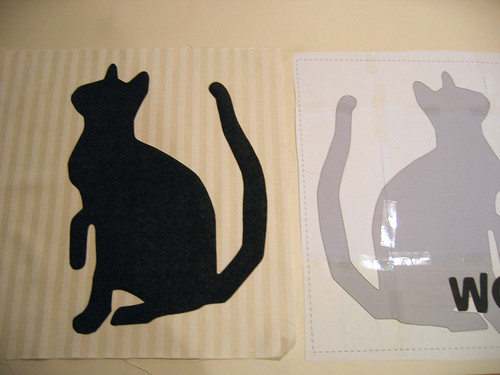
6) Using a small, narrow zigzag stitch, sew around entire applique to seal edges.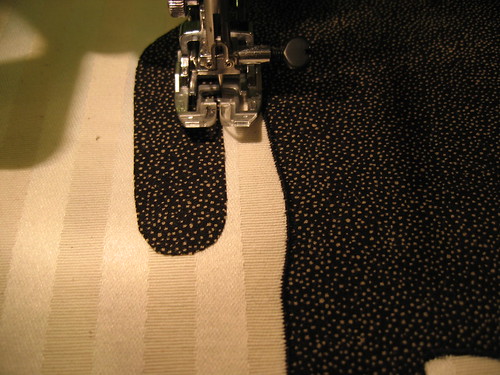
7) Repeat steps 4-6 for the letters.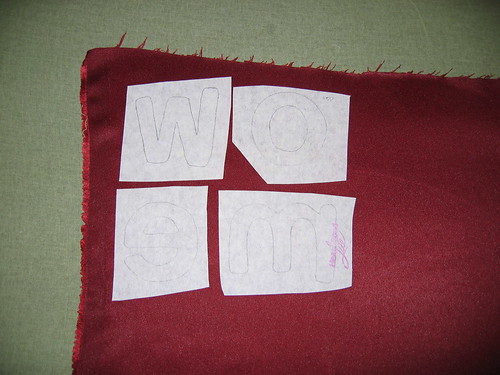
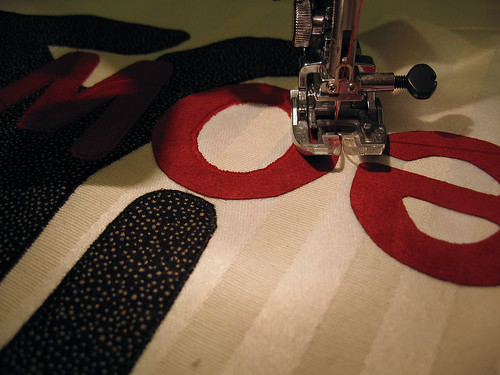
8) Finish the pillow as desired. I listed a few tutorials here. If you want a book, I recommended this oldie but goodie. I finished mine with piping, an overlap and buttons, but you could use a zipper or even sew the entire pillow closed.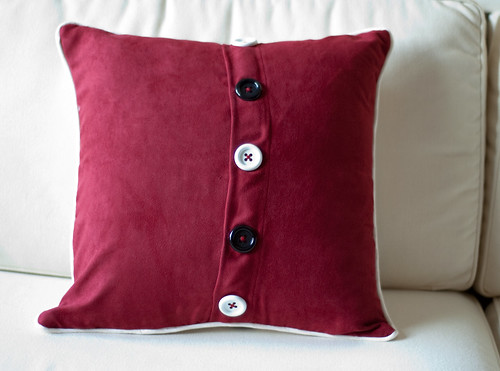
Applique Cat Pillow (No-Sew Version)
Fabric:
1/2 yard (or a piece at least 15 inches x 20 inches) for cat
1/4 yard (or a piece at least 4 inches by 12 inches) for letters
Supplies:
Finished 18 inch pillow with removable form (check that the fabric is able to be ironed at medium heat)
No-Sew Iron-on Adhesive (I like HeatnBond Ultra)
1) Remove form from pillow.
2) Follow steps 2-5 above to print out diagram, trace cat on to iron-on adhesive, attach iron-on adhesive to fabric, and then attach cat iron-on to pillow case. Repeat with letters.
2) Reinsert form. Done!
Showing posts with label instructions. Show all posts
Showing posts with label instructions. Show all posts
Thursday, September 23, 2010
The pillow says "meow" (tutorial)


Thursday, July 8, 2010
Quicker that driving to Hallmark
This weekend I realized that today is the birthday of a dear friend (and the day before my birthday, hint hint!). I needed to get a card in the mail pronto, and I usually keep a stock of birthday cards on hand for just such emergencies. However, my supply was fresh out which left me with two options:
1) Get in the car, drive to Hallmark, look at eleventy-seven-million cards trying to find one that is cute but appropriate, look at a few more cards for giggles, pay way more than I think a stupid card is worth, drive home...
2) Make something.
Since this friend is the queen of scrapbooking and always makes adorable cards for every major (and a few minor) card-sending holiday, I felt like she deserved something special. I don't scrapbook, so there is no cute paper in my house, but I have plenty of cute fabric!
This is what I came up with:
Cute, right? Here's how you can make one.
Supplies:
Cardstock
Envelope (I save envelopes from unused invitations and such. Very handy)
Fabric scraps
Fabric cutting scissors/rotary cutter with mat
Paper cutting scissors (paper will dull your good fabric scissors, so I keep a separate pair for paper, etc.)
Thread
Used, but not abused, sewing needle (after I finish a sewing project, I put the needle in a case marked "used, for paper." They might be too dull for fabric, but still have some life left in them. Don't use a needle you used on paper for a fabric project--see above regarding paper scissors)
How-to:
Cut two pieces of cardstock to fit in your envelope. Mine ended up being 4.5"x6"
Select fabric scraps and trim into pleasing shapes, layering on a cutting mat if possible.
Note: I had to select from my "cool" stash of scraps as the "warm" stash was occupied.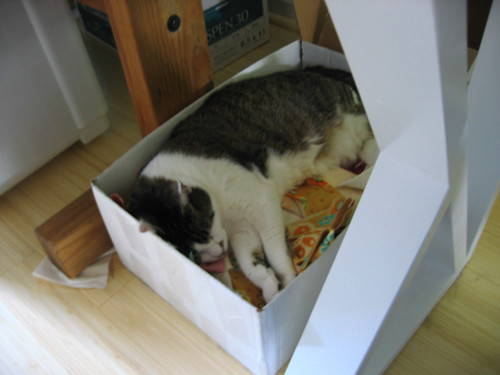
Trim your fabric to about 1/2" larger than your cardstock (so mine was 5"x6.5"). This is easier with a cutting mat and rotary cutter, and is only really necessary to get some of the excess out of your way.
Center one piece of cardstock under your fabric and sew the layers together with zigzag, buttonhole, or other decorative stitches. Try to start from the center/bottom layers and work your way up and out.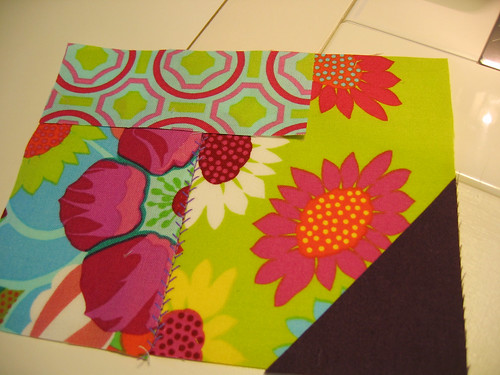
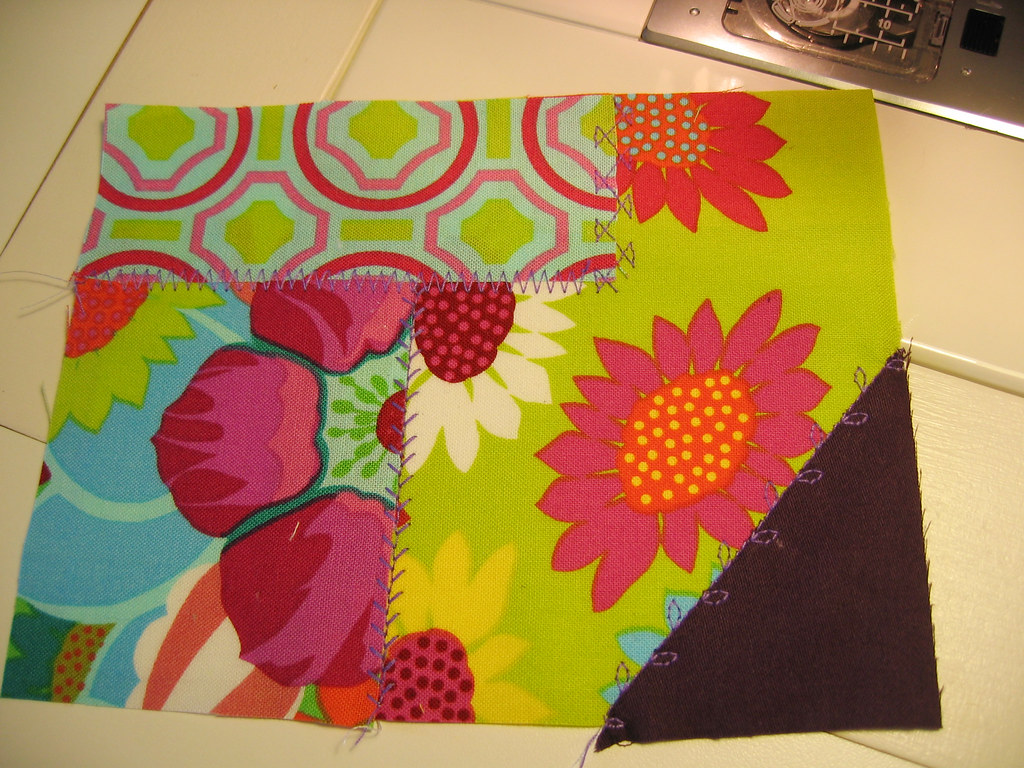
Add embellishments, etc. I stamped "Happy Birthday" on another fabric scrap and attached it in the middle.
Trim fabric to the size of the cardstock. Place the other piece of cardstock on the back of the first one and attach with a narrow zigzag or buttonhole stitch around the edge. This will give you a nice clean surface to write your message.
Tada! Totally quicker than driving to buy a card, and so much cuter.
Friday, December 19, 2008
My gift to you - a last minute gift!
My dear friends,
Thanks for a wonderful year! I've had such a great time talking to you and getting to know new people from around the world. I've been so very lucky this year!
To thank you, I've make a new little pattern that I think you'll really enjoy. I'm giving it to you early because it's always tortuous for me to wait until Christmas (substitute your favorite holiday as needed) to see the joy--and to show off my creations!
Plus, this new pattern will make a great last minute gift. You can stitch up a whole pile lickety-split and have gifts for everyone. So here you go--the Tiny Tote!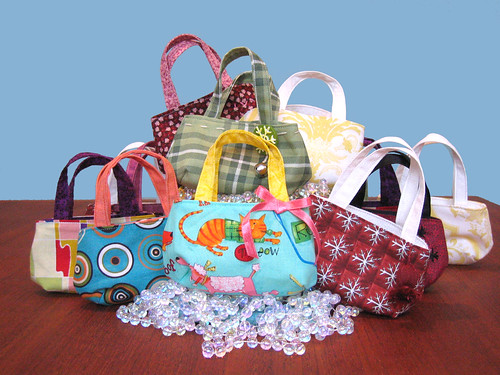
Download here. You'll need Adobe reader, available free here.
These guys are itty-bitty, perfect for ornaments,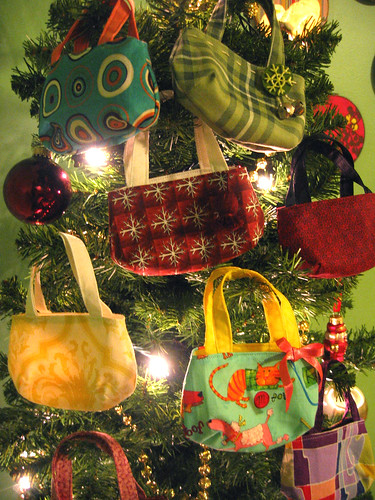
or gift tags,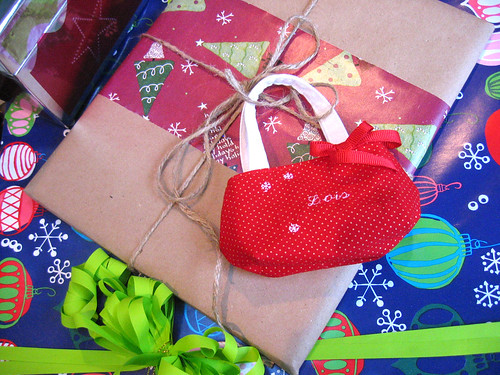
or a business card holder for your desk,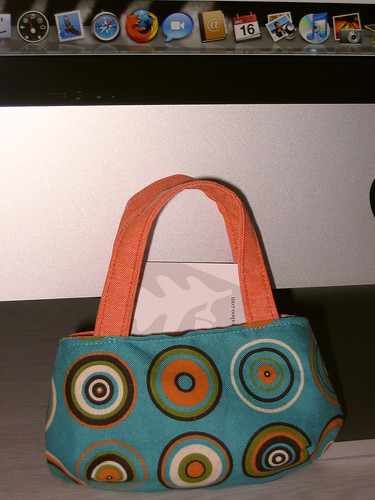
or tuck a gift card or other treat inside for a great gift.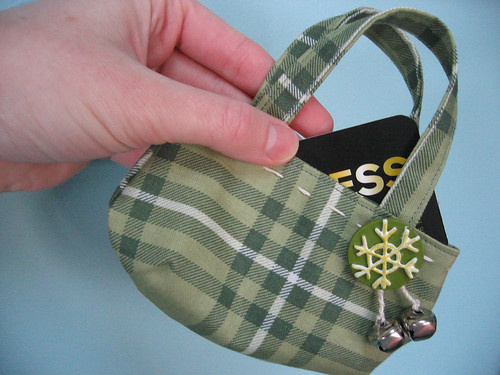
Hope you enjoy this pattern! Wishing you and yours a very happy holiday!
Wednesday, September 17, 2008
Scrappy Reverse Applique Pillow Tutorial
Thanks for all your lovely comments here and on flickr about the pillows! I've got a tutorial put together so you all can make some cute pillows with your scraps too.
You'll need background fabric for the body of the pillow, scraps for the reverse applique, coordinating thread, a sharp pair of scissors with a small point, and some kind of fabric marking pen--I like the water erasable ones, but DO NOT IRON the marks from those pens or they will be permanent (ask me how I know!).
First, cut your background fabric to the size of pillow form plus 1 inch (1/2 seam allowance on each side). Draw your design on the right side of the fabric, making sure not to draw in the seam allowance. Feel free to adapt my design for your own use. A note about your design: you are drawing the STITCHING lines on the fabric. What is inside the lines will be your applique fabric. Closed simple shapes work best.
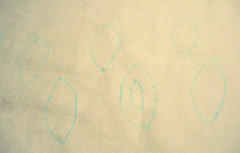 Leaves work well. I could see a cute sunflower too!
Cut a scrap of fabric slightly larger than your applique shape.
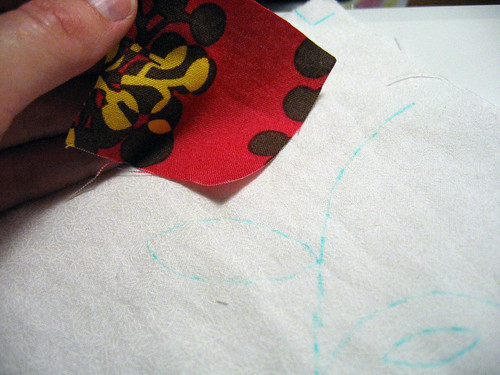
Place your applique fabric behind the backround fabric face up--that is, the right side of the applique fabric to the wrong side of the background fabric.
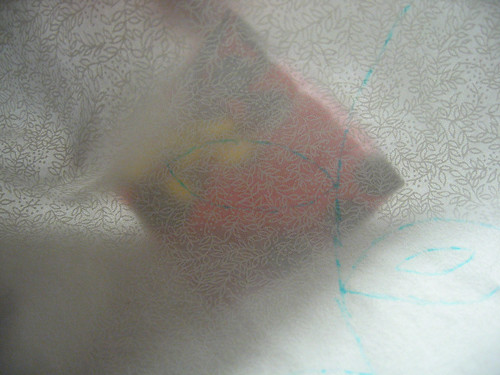
Set your machine to a narrow zigzag with a short length. Test your zigzag on a scrap fabric to make sure you have nice, somewhat dense stitching. From the right side of the backround fabric, follow your drawn line to stitch your two fabrics together. Leave the thread tails long.

Draw your thread tails to the back. Knot and trim tails.

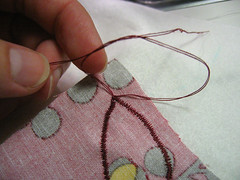
This is the "correct" way. If you get lazy like me after doing a bunch, you'll probably find yourself clipping the tails, applying fray-check and hoping for the best! :)
Trim the applique fabric close to the stitching line (but not too close!).
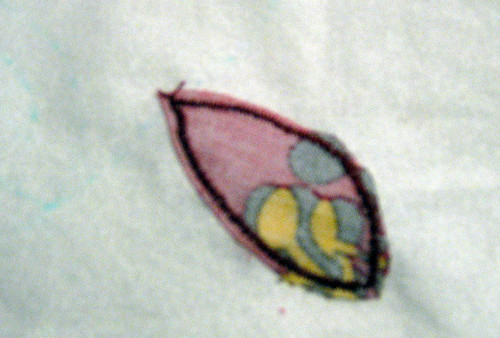
ooo, blurry! Sorry! Hopefully you get the idea...
From the right side of the background fabric, carefully cut the background fabric that is inside the applique without cutting the underlying applique fabric. This is where those small pointy scissors come in handy.
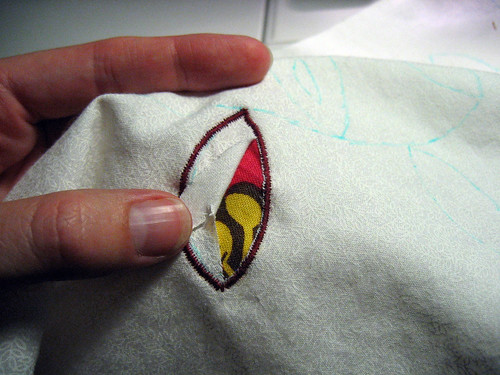
Ta-da!
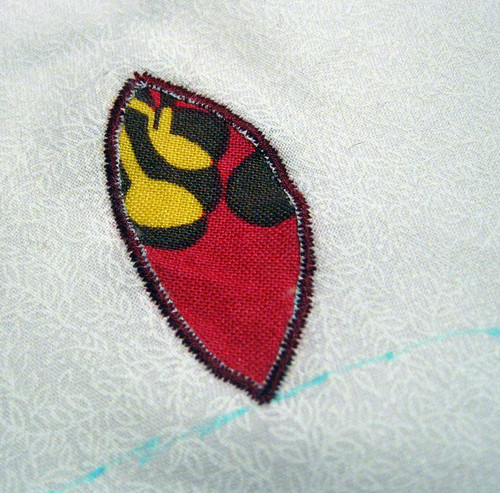
Repeat for the rest of your design, then add in any connecting stitching lines.
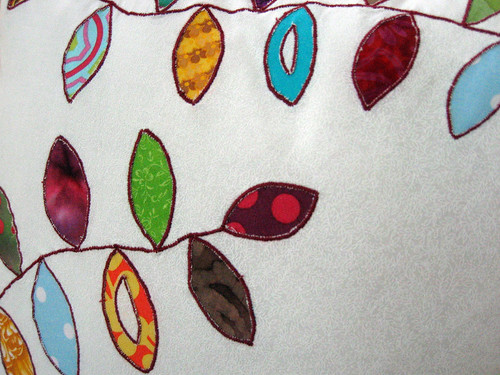
Finish you pillow as you see fit. There are a lot of other tutorials out there, depending on what you like. Here's a few that I found, provided without guarantees however:Button back pillow, Basic throw pillow tutorial, Zippered pillow.
(All I did was cut two pieces that were the same width as my front but 1/2 length + 3 in. Turn up a half inch then 2 inches and sew the hem. Lay these face down on the front then sew and turn. All done!)
Phew! Lovely work, now it's time to use that pretty pillow for some well deserved lounging!
Monday, July 21, 2008
Art for the non-artistic
I was feeling all artsy fartsy this weekend and staring at the big empty wall over my couch. Oh how I'd love to paint a giant masterpiece that would impress all my friends! But alas, my painting skills topped out with stick figures and some days it is hard just to stay within the lines. Yet I had to do SOMETHING.
My inspiration struck when poking through the lovely blog of Anna Maria Horner, another Nashvillian with a drool-worthy house and studio (and fabric line!). Her appearance on the Martha Stewart Show featured a project that even my so-so painting skills could master - painted fabric silhouettes.
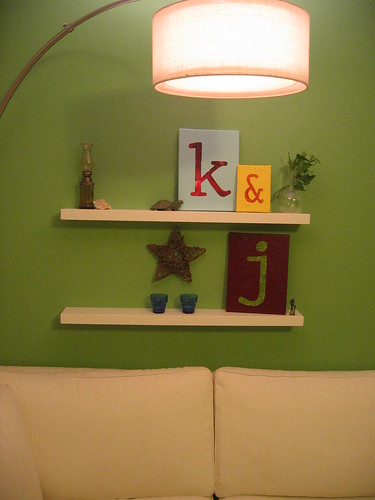
For my lovelies, I picked up some "batik" fat quarters at JoAnn's, some canvases at Michaels (hurrah, on sale), and some Royal Coat decoupage finish. I skipped the Modge Podge because it said something about lingering tackiness on the label which didn't sound cool. My stencils were actually huge printouts of selected letters. I have this weird thing for decorating with text--it always catches my eye--and I wasted oodles of time on dafont.com searching for JUST the right font.


Done!

And then I shopped the house for other items, put up some shelves, and we have art!
Friday, May 30, 2008
Friday distractions - Tutorial MANIA!
Hi, my name is Kim and I'm a tutorial hoarder.
I've got mucho tutorials for uber cute things that I've stumbled upon and they sit idle in my bookmarks folder. But they are SOOOO cute I want more, more, MORE!
And yet, I think I've only actually made 1 thing from these tutorials. Sigh.
I feel I must spread the love, as some of these are way too cute to not be made and loved. Not many pics, as they belong to other people, but trust me--you'll love them!
Piggy Bank Wallet from Nosey Nest (crazy cute!)
Fabric Basket from Pink Penguin
Knit Opera Gloves from Sweaterscapes (have I mentioned that I don't knit? But I REALLLLLY want these!)
Cereal Gift Boxes from Chrisjob via curbly
Christmas Pixies from Chickpea Sewing Studio (never to early to start!)
Soft Tree Pattern from Little Birds Handmade
I'm a milkmaid? Summer time Dress by laurasaurus via Craftster (oooh, I forgot about this! I should make it...)
Stuffed Acorn from Old School Acres
Fabric Bucket from Ric Rac (love!)
Reversible journal cover from Kirin Notebook
Phew! I know there are more hidden in my bookmarks, but I keep getting distracted by all the cuteness!
There is one more that I actually made. The Pleated and Darted Purse by U-handbag. (There are a bunch more tutorials there, too!)
I made this bag when I was a bridesmaid in my friend's wedding. We were charged with finding our own black shoes to coordinate with our champagne dresses. Evidently I'm ridiculously tall in the minds of David's Bridal designers, so I had to find flats that wouldn't look silly if they stuck out from under my dress. Long story (shopping trip) short, I found some champagne ballet flats with black lace overlay that matched perfectly!
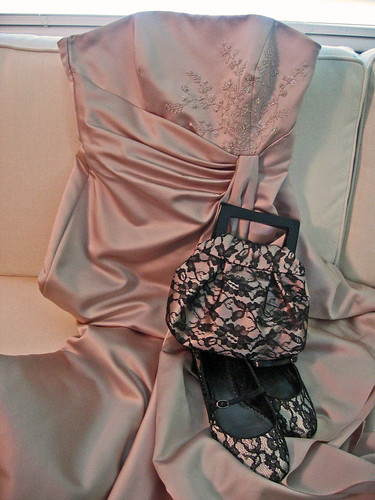
And that required a matching bag, of course:
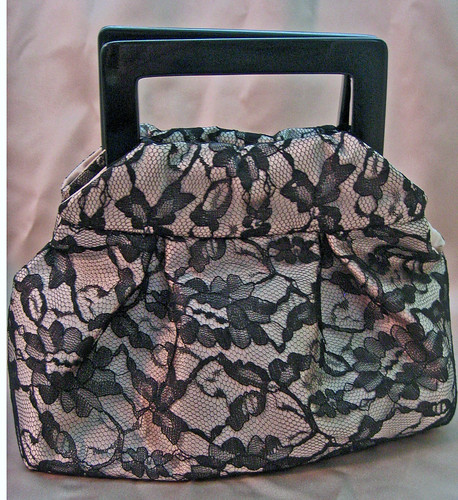
I used matching satin with black lace on top. I treated the two fabrics as one as I stitched the bag. The tutorial was very well written, by the way!
The addiction is itching again...Anyone have any more tutorials I can oogle?
Friday, April 4, 2008
Pattern Kit now on Etsy
Hey folks! Got to be quick today but wanted to let you know that the Mini Stuff Stasher Pattern Kit is in my etsy shop

Yippee! Now I've got to get back to sewing those Tremendous Totes :)
Thursday, April 3, 2008
The mini stuff stasher - free pattern!
That's right, loyal blog readers, I've finished a pattern! And I want to give it to you for free! Hurrah!

This pattern is for the mini stuff stasher that I showed you earlier. It's a great little bag, and a fun way to use up scraps and play with color combos (so you'll be all set when the Tremendous Tote pattern is available!) Check out the cute one my tester made:

Okay, so how do you get this pattern? I've posted it as a pdf download here. Save the pdf to your computer to aid in the printing process. And how do you print said pdf? Glad you asked, as this is important.
1. Make sure you have the free Adobe Reader. If you don't, you can download it here.
2. Open the print dialog box (File->Print) and set page scaling to NONE like so:
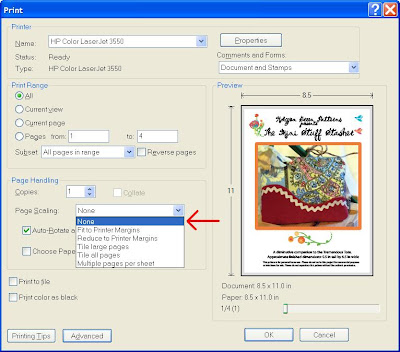
1. Make sure you have the free Adobe Reader. If you don't, you can download it here.
2. Open the print dialog box (File->Print) and set page scaling to NONE like so:

3. Verify that the test square on the pattern page (page 4) is exactly 2 in by 2 in (5 cm by 5 cm for my non-US friends).
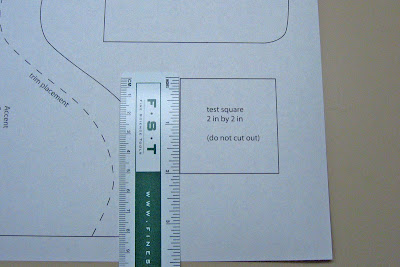

4. Get stitchin'!
But Kim, you say, I don't want to mess with all that printing nonsense! And I don't want to have to go to the store and find the little key clip and twill tape so that I can clip my creation to things!
No worries, my friends. I'm going to have a lovely color printed pattern plus hardware kit available on my etsy site starting tomorrow. Yippee! All you'll need is to dig up some fabric (which I'm sure you have plenty of...), a 7 in zipper, and some interfacing if your fabric is lightweight and you'll be good to go. Aren't I the nicest?
And the Tremendous Tote pattern? Patience please, it's on the way!
Have fun!
But Kim, you say, I don't want to mess with all that printing nonsense! And I don't want to have to go to the store and find the little key clip and twill tape so that I can clip my creation to things!
No worries, my friends. I'm going to have a lovely color printed pattern plus hardware kit available on my etsy site starting tomorrow. Yippee! All you'll need is to dig up some fabric (which I'm sure you have plenty of...), a 7 in zipper, and some interfacing if your fabric is lightweight and you'll be good to go. Aren't I the nicest?
And the Tremendous Tote pattern? Patience please, it's on the way!
Have fun!
Thursday, March 20, 2008
The best oatmeal cookies EVER
I promised you a yummy post today, did I not? Well, here is, hands down, the best oatmeal cookie recipe in the world. The original recipe was published in Cooking Light, and I've made a few modifications of my own. Some days I consider them practically health food, but then I do love a good cookie... Ingredients
3/4 cup all purpose flour (about 3 1/3 ounces)
1 cup regular oats
1/2 teaspoon baking soda
1/4 teaspoon salt
3/4 cup packed brown sugar
1/4 cup butter, softened
1 teaspoon vanilla extract
1 large egg
1/2 cup dates, chopped
plus:
3/4 dried cranberries and 1/3 cup white chocolate chips
OR
3/4 cup raisins and 1/3 cup cinnamon chips (Hershey's makes them)
OR
your own combination of fruit, chips and/or nuts
Preparation
Preheat oven to 350°.Lightly spoon flour into a measuring cup; level with a knife. Combine flour, oats, baking soda, and salt; stir with a whisk. Place sugar and butter in the bowl of a stand mixer; beat at medium speed until well blended (about 3 minutes). Add vanilla and egg; beat well. Mix in chopped dates. Gradually add flour mixture, beating until blended. Add fruit and chips combo; beat at low speed just until blended.
Drop dough by tablespoonfuls 2 inches apart onto baking sheets coated with cooking spray. Bake at 350° for 12 minutes or until lightly browned. Remove from oven; cool on pan 1 minute. Remove cookies from pan; cool completely on wire racks.
Mmmmm, cookies.....
Subscribe to:
Posts (Atom)


 Posts
Posts