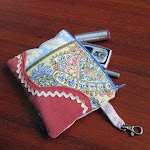
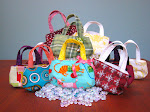
Friends, my second pattern is here!!
I'm so excited about this cute little number. I'm also excited about my new packaging and my new color instruction booklets. Whoo!

Blatant self-promotion, I know, but it's in the shop!
Showing posts with label handbags. Show all posts
Showing posts with label handbags. Show all posts
Tuesday, March 22, 2011
Make yourself flirty and fabulous!


Tuesday, August 3, 2010
Pattern Review: Amy Butler Sophia Bag
Last year, when my mother was visiting, we were looking through my patterns in preparation for our annual fabric shopping extravaganza. She took one look at the Amy Butler Sophia pattern and said "That's my Christmas present from you!"
We went shopping and picked out fabric for her bag and for mine. I made mine first to try out the pattern. Her bag did not get finished for Christmas, so it became a Mother's Day gift...not really. I FINALLY gave her the bag this week as a "because you are wonderful and being here on vacation means I save on postage" present. She loved it all the same. And now that the bag is in her hands I can share my review of the Amy Butler Sophia pattern!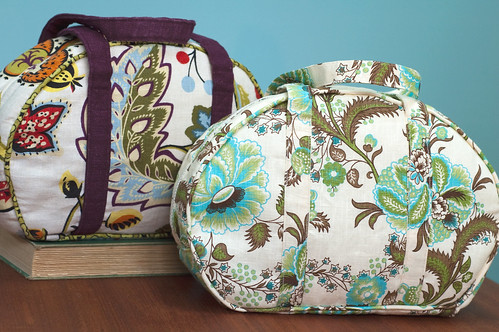
My bag is on the left; my mom's is on the right.
1) Like all Amy Butler patterns, this one is easy to follow. I had done piping before so I didn't have much problem with that. Frankly I didn't really follow the directions at all because I hardly ever do--there are only so many ways to assemble a purse! I really only looked at them for the zipper, which brings me to point number 2.
2) The pattern called for a "purse zipper"--two pulls that move outward from the center. My fabric store only had Coats purse zippers in black and an ugly brown. Um, no. For my bag (which I made first) I just got one long zipper: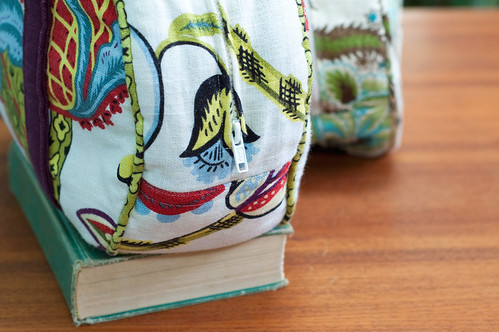
This worked fine, but is kind of a pain when you want to get into the bag. You have to open the WHOLE bag just to get in, and it's a long way around. Not too speedy.
For my mom's, I wanted to preserve the center opening so I got smarter. Instead of one 22 inch purse zipper, I got two 11 inch regular sport zippers.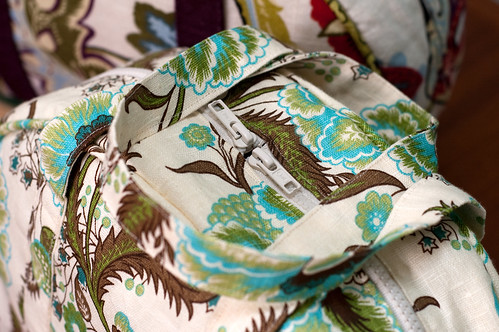
The only tricky part was keeping the zipper tape out of the way at the top. I ended up tucking them back and basting and then covering with the bag lining. This way the pulls would be close together like a purse zipper but I got the color I wanted! I also put on some pretty beads as zipper pulls after I took this picture, which really classed up the whole bag.
3) I had to do some fiddling with the lining to get it to work. For my bag I followed the instructions and sewed together the whole lining and stuffed it into the outer bag. While I was careful with my sewing, all the layers and piping of the outer bag made it a bit smaller than the lining (plus there was no accommidation for the turn of cloth. Thus my lining is too large. I went ahead and sewed it in around the zipper, but the false bottom covers a big wrinkle of extra fabric and my pockets go down onto the bottom of the bag. One day I will get around to fixing that.
For my mom's bag, I sewed the top zipper flaps to the sides of the lining. Then I put this in the outer bag and pinned in place. I marked where the bottom seam was and used this line to attach the bottom (which I also resized to match the bottom of the outer bag). No saggy lining on hers!
This also brings me to another point. I made her pockets like the pattern and they turned out cute: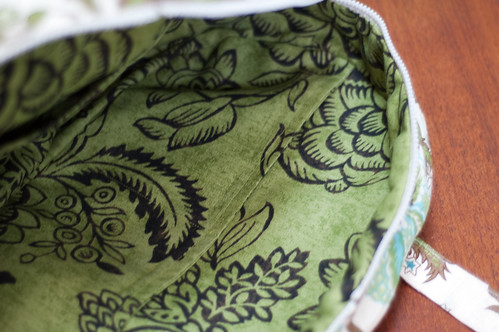
I added some of the extra piping to the top of my pockets, and I like the contrast. However, the weight of the piping makes my pockets a bit saggy. Just a warning if you go that direction.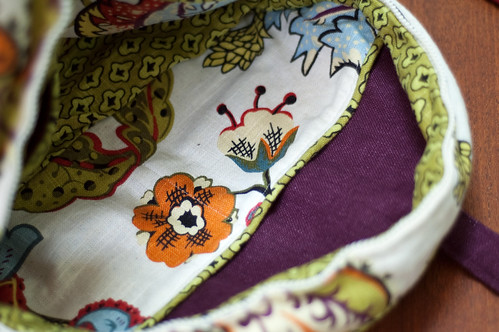
Judging my my mom's reaction, the Sophia bag is a success! I would definitely say that an ambitious beginner or intermediate sewer should have no problem with this pattern.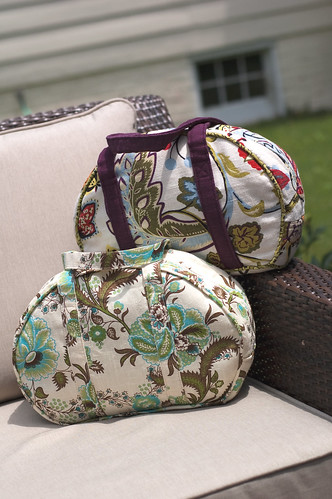
Sunday, March 7, 2010
A Tremendous comeback
Been a long time since we've seen the old Tremendous Tote, huh? Well, that girl is neither gone nor forgotten. A lovely customer with good taste commissioned a custom Tremendous Tote, and it turned out fabulously. See for yourself:
Front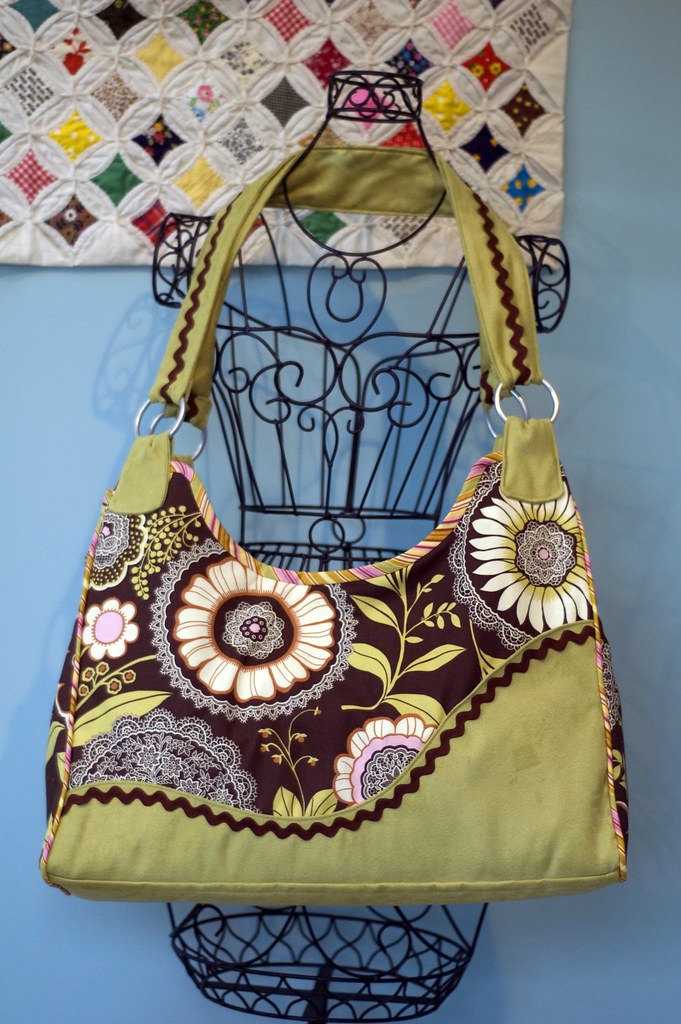
Back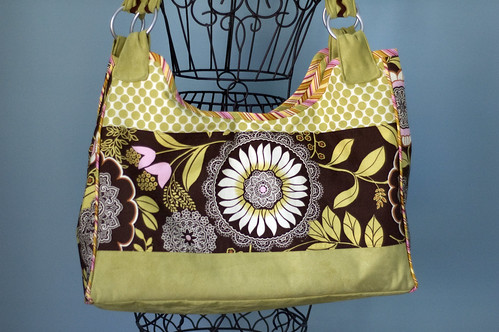
My customer wanted to feature the main fabric (Amy Butler Lotus Blossom) but jazz it up a bit. We came up with this stripe solution which looks really sharp.
Top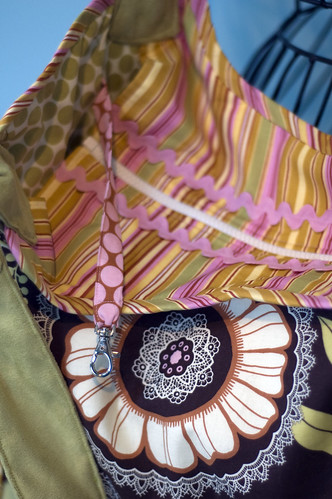
Turning the stripe fabric on the bias made for some really cool diagonal stripes on the trim and piping.
Inside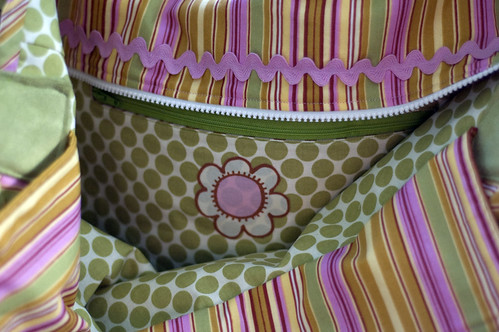
While the custom option is not for the faint of heart (or those in a hurry), there are still original "Georgia Peach" versions available in my etsy store.
Monday, September 14, 2009
Sneak peak
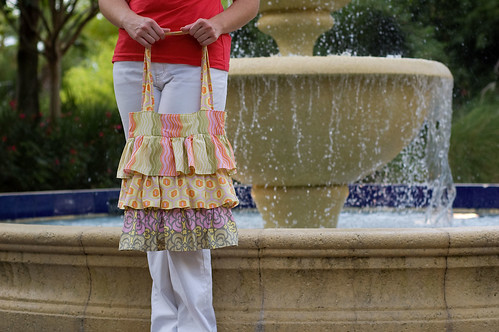
I took my newest design out for a little field testing this weekend.
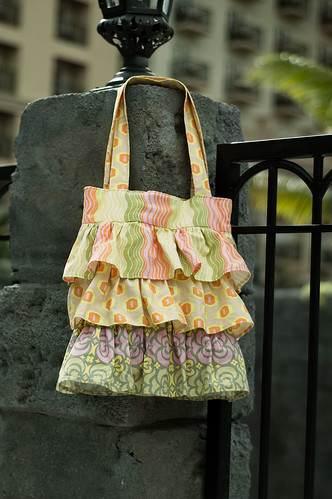
I love the flirty ruffles. They give off such a playful beachy feeling.
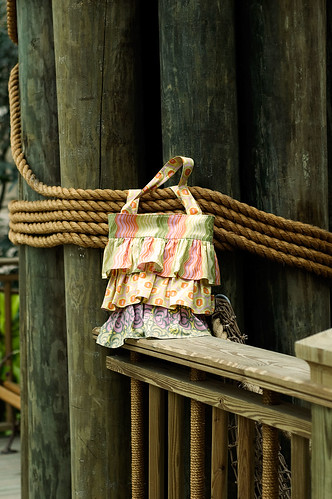
This bag also gave me a chance to use some of the pretty Amy Butler Midwest Modern fabric hanging out in my stash. Slowly but surely I'm working through the stash, I promise. Just don't ask what the UPS driver is delivering...!
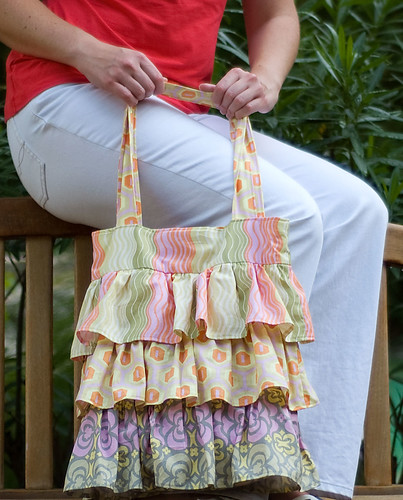
Based on the reaction of "people on the street," I think this design is a winner. What do you think? Should I fast track pattern writing for this pretty little number?
Thursday, February 12, 2009
Pattern Review: Amy Butler Frency Bag
In the Christmas rush, I found myself needing one more gift but short on time and ideas, as usual. I dug through my stash of fabric and found something I knew the recipient would love (she a total cat nut) and decided to forgo designing a bag and grabbed my Amy Butler Frenchy Bag pattern. Yes it was dangerous to try something new with no backup plan, but it's Amy Butler so it was practically guaranteed...
The result?
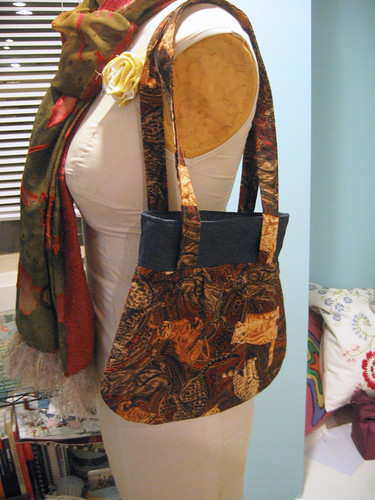
Love it!
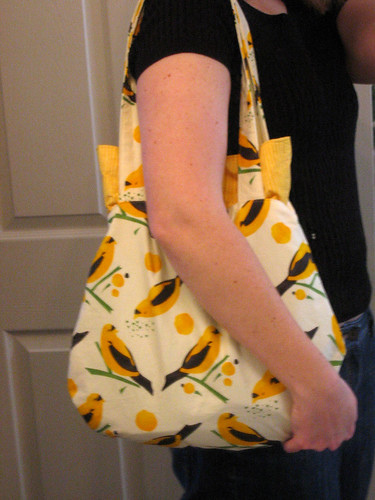
I loved it so much that I whipped up another one a few weeks ago to take on a work trip, and it worked out beautifully (forgive the horrid bathroom mirror photo, please!)
So now it's time for the good, the bad, and the mistakes that I hope you can learn from:
What I liked:
- Um, it was easy. I would totally recommend this one as a first timer bag if you can handle a challenge/have a good teacher. Or if you are feeling lazy and want something cute with minimal effort.
- Pockets! I didn't even know there were pockets inside until I started cutting out, but I did end up making a small change (more on that later).
- There are two bag size options, and two handle lengths. I mixed them up a bit, making the small handbag size with long straps for the gift, and the larger bag for myself. I like a big bag (obviously) but not everyone does, so that's a plus.
What I don't know if I like:
- The layout. I totally didn't follow the cutting layout at all because I wanted the interior pockets to be made of the exterior fabric (because I like a bit of cuteness when I look into my bag). So I ignored the cutting layout and just made my own to best utilize my fabric. Therefore I also have no idea if the amounts specified on the pattern are reasonable.
What I didn't like/what I changed:
- I didn't have any sew-in interfacing, so I used fusible. I actually didn't like that so much, so I'd do something different next time (more on that later).
- I sewed a vertical dividing line in the pockets because the are rather large and seemed a bit floppy. Worked out wonderfully and I'd highly recommend it!
- On the bag I made for myself I was using a one-way design and didn't want the birds to be upside down on half of the strap. Instead of cutting them on the fold, I cut the two pieces separately and sewed a seam at the middle so everyone is right side up!
- The last step has you doing some weird topstitching on top of topstitching to keep the lining inside of the bag and not flopping out. This is necessary, but I didn't like the idea of sewing another line on top of a previous one as I knew there was no way I could be that precise and it would look messy.
Instead, I did a littel "stitch-in-the-ditch" on the side seams and augmented with a tiny bit of topstitching on the top panel behind the straps, so it would be hidden when carried:

What I wish I'd done differently:
- Interfacing! I don't really recommend a fusible like I did. Didn't really have the effect I wanted, but it's okay. Personally I don't like really stiff bags, so I would probably go with a sew-in that wasn't too heavy for the body, but the top needs something more.
- Top reinforcement is a top priority (heehee)! The fusible interfacing just didn't cut it. My top is a bit saggy when I carry it, and doesn't really stand up to the magnetic clasp. I'd probably use a mid-weight sew in on both the exterior and "lining" sides of the top (so cut 4 of interfacing instead of 2) to give it the boost it needs.
- Move the magnetic clasp. The pattern has you putting the magnetic clasp right over the seam between the top and bag. That's all well and good, but causes the conflicts with topstitching that bothered me so much. With a reinforced top, you could move the clasp up to the middle of the top part and then have plenty of room for topstitching the exterior and lining together.
- Keeping it all together with topstitching. My mods have worked fine, but ideally I'd want to put a line of topstitching on the top part of the bag right above the seam. Moving the magnetic clasp would mean you don't have to stop your stitching line and leave an unsightly gap in the topstitching.
Clear as mud?
Anyway, this pattern is great if you follow the directions even if I didn't. If you want to make it even better, I encourage you to play with it a bit and I think you will be pleased with the results!
Happy sewing!
Best,
Kim
Friday, December 19, 2008
My gift to you - a last minute gift!
My dear friends,
Thanks for a wonderful year! I've had such a great time talking to you and getting to know new people from around the world. I've been so very lucky this year!
To thank you, I've make a new little pattern that I think you'll really enjoy. I'm giving it to you early because it's always tortuous for me to wait until Christmas (substitute your favorite holiday as needed) to see the joy--and to show off my creations!
Plus, this new pattern will make a great last minute gift. You can stitch up a whole pile lickety-split and have gifts for everyone. So here you go--the Tiny Tote!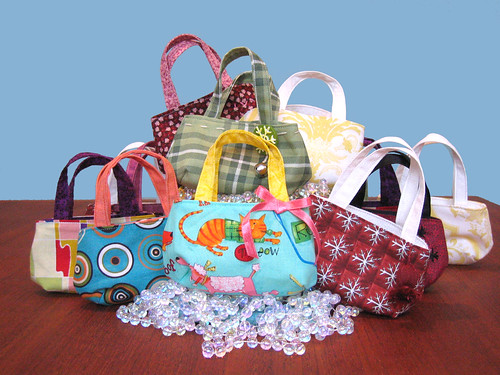
Download here. You'll need Adobe reader, available free here.
These guys are itty-bitty, perfect for ornaments,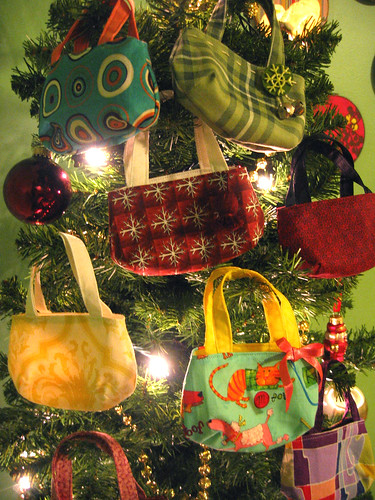
or gift tags,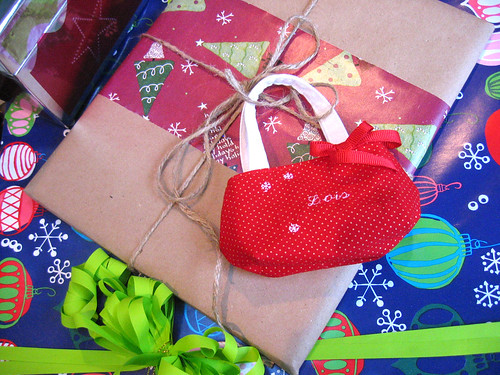
or a business card holder for your desk,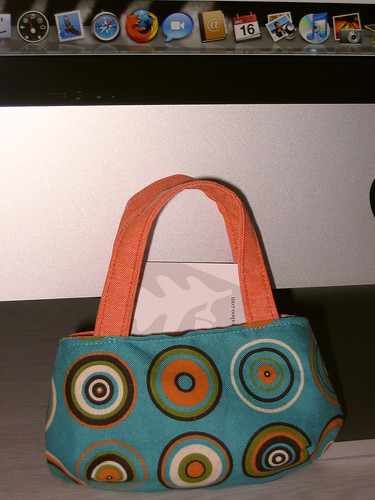
or tuck a gift card or other treat inside for a great gift.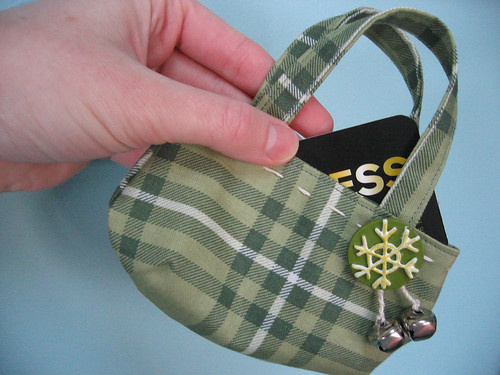
Hope you enjoy this pattern! Wishing you and yours a very happy holiday!
Wednesday, July 23, 2008
Tremendous YOU!
It's here! You are witnessing the official unveiling of my first published pattern, the Tremendous Tote:
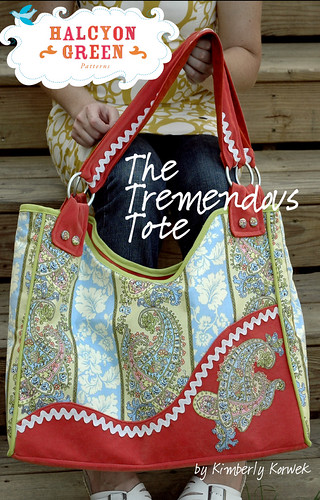
I had so much fun putting this together, so I hope you all enjoy it too. This pattern is so versatile; I can see it as a beach bag, a diaper bag, or as a place to stash goodies as you shop (my personal fav). Check out the cuteness that one of my testers put together:


The pattern will be for sale starting today in my etsy store. However, shipping won't start until Saturday, July 26th while I wait on one last thing to be printed. So to thank you for your patience, I will be giving FREE SHIPPING to all "pre-orders" placed before midnight (CDT) on Friday, July 25. So pop on over to my etsy shop and take advantage of this deal.
I hope you love the Tremendous Tote as much as I do!
Best,
Kim
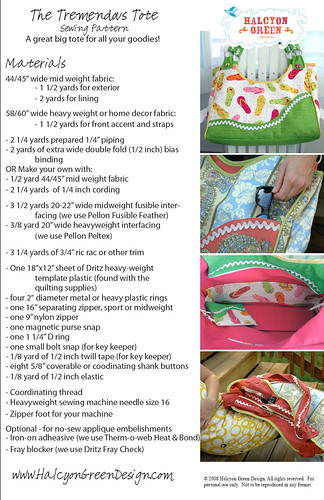
P.S. Want to get a head start? Here's the materials list:
Monday, June 9, 2008
The Tremendous Totes are HERE!
Finally, after much patient waiting on your part, dear friends, I can announce that I've actually finished the Tremendous Totes!
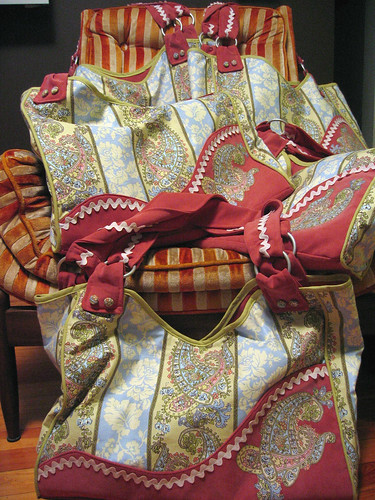
Hurrah!
I know many of you have been anxiously awaiting these, so here's the scoop on how to get your hands on one:
1. The totes will be listed on my etsy site TOMORROW, Tuesday June 10th at (almost) exactly 7:00 pm Central Daylight Time. You can translate that to your local time here (I'm in GMT-6, the same as Chicago).
2. There are only five totes available in this color combo--I'm calling it "Georgia Peach", as I think it fits! There will be other colors (and maybe even a custom option soon), but if you've got your heart set on this exact one you better act fast cause I really really really can't make any more!
3. I'm throwing in a matching mini stuff stasher! They are just too cute and too useful not to be included :)
4. Okay, okay, the price. $147.00 US.
5. Shipping will be stated on the etsy site (check my shop policies later tonight--I should have it updated by then). In short, I'll be shipping USPS Priority with confirmation to US customers, and I will ship internationally as well. I'll figure out international shipping by USPS Priority International zones and spell that out. Please note that you'll have to be responsible for any duties or fees that your country imposes, so check that out before you buy.
Phew. I think that covers it. I'm so excited to get these out to you all. I'm hard at work at other colors, the pattern, and figuring out how I can handle custom orders, so stay tuned for much more excitement. Happy Toteing!
1. The totes will be listed on my etsy site TOMORROW, Tuesday June 10th at (almost) exactly 7:00 pm Central Daylight Time. You can translate that to your local time here (I'm in GMT-6, the same as Chicago).
2. There are only five totes available in this color combo--I'm calling it "Georgia Peach", as I think it fits! There will be other colors (and maybe even a custom option soon), but if you've got your heart set on this exact one you better act fast cause I really really really can't make any more!
3. I'm throwing in a matching mini stuff stasher! They are just too cute and too useful not to be included :)
4. Okay, okay, the price. $147.00 US.
5. Shipping will be stated on the etsy site (check my shop policies later tonight--I should have it updated by then). In short, I'll be shipping USPS Priority with confirmation to US customers, and I will ship internationally as well. I'll figure out international shipping by USPS Priority International zones and spell that out. Please note that you'll have to be responsible for any duties or fees that your country imposes, so check that out before you buy.
Phew. I think that covers it. I'm so excited to get these out to you all. I'm hard at work at other colors, the pattern, and figuring out how I can handle custom orders, so stay tuned for much more excitement. Happy Toteing!
Friday, May 30, 2008
Friday distractions - Tutorial MANIA!
Hi, my name is Kim and I'm a tutorial hoarder.
I've got mucho tutorials for uber cute things that I've stumbled upon and they sit idle in my bookmarks folder. But they are SOOOO cute I want more, more, MORE!
And yet, I think I've only actually made 1 thing from these tutorials. Sigh.
I feel I must spread the love, as some of these are way too cute to not be made and loved. Not many pics, as they belong to other people, but trust me--you'll love them!
Piggy Bank Wallet from Nosey Nest (crazy cute!)
Fabric Basket from Pink Penguin
Knit Opera Gloves from Sweaterscapes (have I mentioned that I don't knit? But I REALLLLLY want these!)
Cereal Gift Boxes from Chrisjob via curbly
Christmas Pixies from Chickpea Sewing Studio (never to early to start!)
Soft Tree Pattern from Little Birds Handmade
I'm a milkmaid? Summer time Dress by laurasaurus via Craftster (oooh, I forgot about this! I should make it...)
Stuffed Acorn from Old School Acres
Fabric Bucket from Ric Rac (love!)
Reversible journal cover from Kirin Notebook
Phew! I know there are more hidden in my bookmarks, but I keep getting distracted by all the cuteness!
There is one more that I actually made. The Pleated and Darted Purse by U-handbag. (There are a bunch more tutorials there, too!)
I made this bag when I was a bridesmaid in my friend's wedding. We were charged with finding our own black shoes to coordinate with our champagne dresses. Evidently I'm ridiculously tall in the minds of David's Bridal designers, so I had to find flats that wouldn't look silly if they stuck out from under my dress. Long story (shopping trip) short, I found some champagne ballet flats with black lace overlay that matched perfectly!
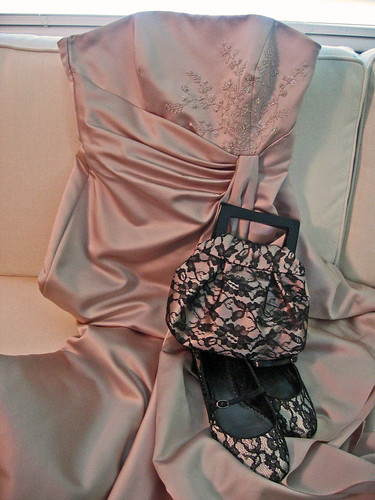
And that required a matching bag, of course:
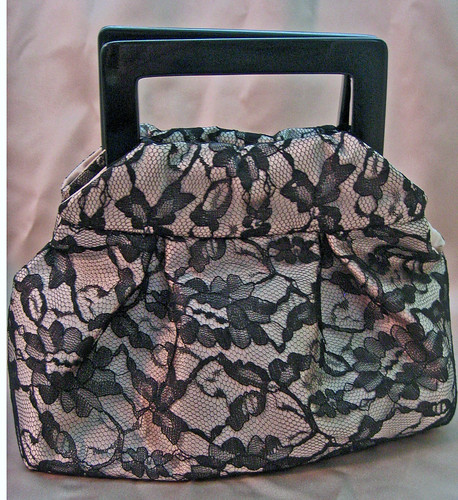
I used matching satin with black lace on top. I treated the two fabrics as one as I stitched the bag. The tutorial was very well written, by the way!
The addiction is itching again...Anyone have any more tutorials I can oogle?
Thursday, April 3, 2008
The mini stuff stasher - free pattern!
That's right, loyal blog readers, I've finished a pattern! And I want to give it to you for free! Hurrah!

This pattern is for the mini stuff stasher that I showed you earlier. It's a great little bag, and a fun way to use up scraps and play with color combos (so you'll be all set when the Tremendous Tote pattern is available!) Check out the cute one my tester made:

Okay, so how do you get this pattern? I've posted it as a pdf download here. Save the pdf to your computer to aid in the printing process. And how do you print said pdf? Glad you asked, as this is important.
1. Make sure you have the free Adobe Reader. If you don't, you can download it here.
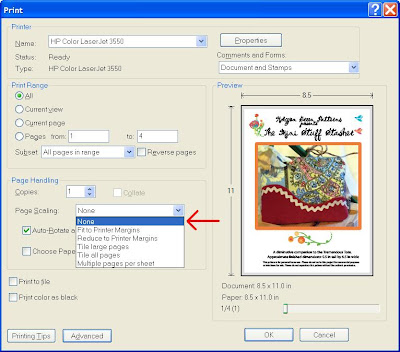
2. Open the print dialog box (File->Print) and set page scaling to NONE like so:
1. Make sure you have the free Adobe Reader. If you don't, you can download it here.
2. Open the print dialog box (File->Print) and set page scaling to NONE like so:

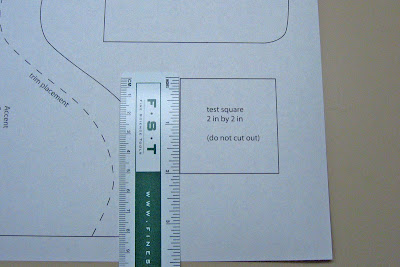
3. Verify that the test square on the pattern page (page 4) is exactly 2 in by 2 in (5 cm by 5 cm for my non-US friends).

4. Get stitchin'!
But Kim, you say, I don't want to mess with all that printing nonsense! And I don't want to have to go to the store and find the little key clip and twill tape so that I can clip my creation to things!
No worries, my friends. I'm going to have a lovely color printed pattern plus hardware kit available on my etsy site starting tomorrow. Yippee! All you'll need is to dig up some fabric (which I'm sure you have plenty of...), a 7 in zipper, and some interfacing if your fabric is lightweight and you'll be good to go. Aren't I the nicest?
And the Tremendous Tote pattern? Patience please, it's on the way!
Have fun!
But Kim, you say, I don't want to mess with all that printing nonsense! And I don't want to have to go to the store and find the little key clip and twill tape so that I can clip my creation to things!
No worries, my friends. I'm going to have a lovely color printed pattern plus hardware kit available on my etsy site starting tomorrow. Yippee! All you'll need is to dig up some fabric (which I'm sure you have plenty of...), a 7 in zipper, and some interfacing if your fabric is lightweight and you'll be good to go. Aren't I the nicest?
And the Tremendous Tote pattern? Patience please, it's on the way!
Have fun!
Thursday, March 27, 2008
Pretty things for you and me
Sorry about the short/lack of posts these past few days. My poor hands were all scraped up due to their unfortunate encounter with the pavement during my last human-powered transportation experiment. Long story short, klutzy gals like me shouldn't ride scooters (even if they are super fun)!

But now that I'm bandaged and on the mend I can show you this:
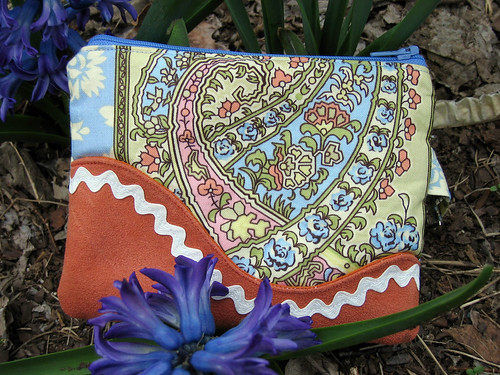
It's the Mini Stuff Stasher! A cute little version of the Tremendous Tote, complete with mini ric rac and a clip for hanging it inside the tote. Fun!
This is my prototype. I've got a few things to work out and then I'll have the pattern and bags available for you all. And the totes, you ask? Well... Linings on parade!
The tote are very temporarily on hold as I ran out of ric rac. OH NOOOOO! But I'll get more soon and then they will be out the door.
In the mean time, I'm putting all my other creations in my etsy shop on sale for 25% off. I know there is only one there now, but I have other bags that aren't listed. I'll get those up as soon as I can nag the boy into taking pics with his good camera. :) These ones are one of a kind, never to be made again, FYI!
Oh, I almost forgot. I am the lucky recipient of some pretty things from Amy Butler herself. I had forgotten that one of my prizes for the contest was Amy Butler fabric. She sent me a package with a very nice note, three yummy fabrics (love!), a set of her new note cards, and a bunch of her new patterns. I'm stoked about trying out the patterns and I'll be sure to review them here for you.
This is my prototype. I've got a few things to work out and then I'll have the pattern and bags available for you all. And the totes, you ask? Well...
 Linings on parade!
The tote are very temporarily on hold as I ran out of ric rac. OH NOOOOO! But I'll get more soon and then they will be out the door.
In the mean time, I'm putting all my other creations in my etsy shop on sale for 25% off. I know there is only one there now, but I have other bags that aren't listed. I'll get those up as soon as I can nag the boy into taking pics with his good camera. :) These ones are one of a kind, never to be made again, FYI!
Oh, I almost forgot. I am the lucky recipient of some pretty things from Amy Butler herself. I had forgotten that one of my prizes for the contest was Amy Butler fabric. She sent me a package with a very nice note, three yummy fabrics (love!), a set of her new note cards, and a bunch of her new patterns. I'm stoked about trying out the patterns and I'll be sure to review them here for you.
Have a lovely almost-Friday, everyone!
Sunday, March 16, 2008
Lucky you!
It's official! Lucky blog readers, there will be more Tremendous Totes soon!
I went to the crazy quilt shop yesterday and am now the proud owner of what may be some of the last of this fabric:
Hurrah!
Here's the deal. I have enough material to make 5 (maybe 6) of these bags. That's it. No mas. Eeek!
I'm currently cranking away on these bags, but I'm just one person and I do have a day job, so please be patient with me.
I will post here before I list the bag for sale in my etsy shop Halcyon Green so you'll have a chance to prepare for that. I'll keep you posted on cost and shipping once I figure that out. One thing at a time, people!
But wait, there's more!
I also scored this loveliness, and I'm super excited about it: Yes! Another colorway! The same AB print in a pink and green version. I'll be making the same bag in this as well, with green faux suede accent/straps (on the left of the pic) and pink piping/binding (a little bit is peaking out on the right of the pic).
Not wanting to get too crazy, I only have enough material to make 2 (maybe 3) of these bags. So, friends, please keep chatting up the comments so I stay motivated to sew and not worry that all my family will be getting the same bag for Christmas this year!
I'm currently cranking away on these bags, but I'm just one person and I do have a day job, so please be patient with me.
I will post here before I list the bag for sale in my etsy shop Halcyon Green so you'll have a chance to prepare for that. I'll keep you posted on cost and shipping once I figure that out. One thing at a time, people!
But wait, there's more!
I also scored this loveliness, and I'm super excited about it:
 Yes! Another colorway! The same AB print in a pink and green version. I'll be making the same bag in this as well, with green faux suede accent/straps (on the left of the pic) and pink piping/binding (a little bit is peaking out on the right of the pic).
Not wanting to get too crazy, I only have enough material to make 2 (maybe 3) of these bags. So, friends, please keep chatting up the comments so I stay motivated to sew and not worry that all my family will be getting the same bag for Christmas this year!
Wednesday, March 12, 2008
WOW
So today I'm plugging away at work, cursing my fickle experiments and wishing I was outside enjoying the taste of spring we're getting. I take a little brain break and pop over to the Amy Butler contest Flickr page. They promised to announce the contest winners today and I was curious which of the beautiful bags had one. And, well, see for yourself.
Seriously? Seriously!
I almost jumped out of my desk when I saw that! Are you kidding me? The winner!?!?! Wow...
Okay, I'm super excited and just totally flabbergasted. I mean, I love my bag, but who would have thought that Amy Butler would love it too. I mean, the woman's designs are just so cool. And the competition was so stiff. Did you see some of those? Awesome...
Yeah. A good day after all. Happy happy!
:)
P.S. To add to the flattery, people have already been asking if I sell these. TOOO COOL! Anyway, if you are one of those, I don't have anything officially worked out yet. But when my new machine comes (!), I'll definitely be stitching up more of this design, probably by special order only. Contact me through the comments here if you have to have one (I won't publish your info) and we'll work out the details.
Friday, February 29, 2008
The tremendous tote makes its debut
I've finished the tote and posted the pictures in Flickr for the contests. Check them out here:
This bag was so fun to make, although it was definitely a challenge. Stitch, rip, stitch, rip, stitch... Although it's practically perfect, so completely worth it!
The bag itself is a wonderful prize, but I sure would love to win that grand prize... Sewing many layers on my baby machine precariously balanced on a TV tray is a tad bit tricky, to say the least!
Wednesday, February 27, 2008
Closing in...
Almost done with the front! Tick tock, tick tock! Gotta hurry if I'm going to finish...
Tuesday, February 19, 2008
Making progress
The lining is done! One small step towards completing my super duper tote. One side features a zip pocket and paisley embellishment, plus a ring for clipping reusable shopping bags.
 The other size features multiple slip pockets for my many modern gadgets that need a home plus a key chain so the little buggers don't get lost in the bottom.
Still much more to do...Back to sewing!
Saturday, February 16, 2008
Uh oh, more fabric
I spent a good portion of the day at Stitcher's Garden in Franklin yesterday. I even called Mom while I was there to see if she needed anything, and she was incredibly jealous.
Anyway, that store has all sorts of goodies. They had the AB oxford stripe I was thinking about, but I wasn't so in love with how the Waverly fabric went with it once I saw it up close. Never fear, I found something even better: "Vintage" Amy Butler Charm fabric. I don't even remember seeing this when it was first out, but I LOOOOOVE it. It has the yummy peach color, so it goes with my faux suede. I picked up some green light weight twill to use for the piping. I'm even going to attempt to isolate some of the paisley motifs for the front. This store never gets rid of anything as they still had quite a bit of this fabric as well as other discontinued AB fabrics. And the ladies working there actually have a method to their madness and know all the fabric they have, even if it does look like a textile truck barfed up bolts...
Apparently they don't ever get rid of notions either. I picked up these too: Cover-a-buckle? I don't think they even make these anymore. If they did, they would certainly be more than $1.75. The plastic is all brittle-I stuck my finger through the front pulling it from the bag! Ha! Gotta love those little small town shops...
Subscribe to:
Posts (Atom)


 Posts
Posts