Thanks for all your lovely comments here and on flickr about the pillows! I've got a tutorial put together so you all can make some cute pillows with your scraps too.
You'll need background fabric for the body of the pillow, scraps for the reverse applique, coordinating thread, a sharp pair of scissors with a small point, and some kind of fabric marking pen--I like the water erasable ones, but DO NOT IRON the marks from those pens or they will be permanent (ask me how I know!).
First, cut your background fabric to the size of pillow form plus 1 inch (1/2 seam allowance on each side). Draw your design on the right side of the fabric, making sure not to draw in the seam allowance. Feel free to adapt my design for your own use. A note about your design: you are drawing the STITCHING lines on the fabric. What is inside the lines will be your applique fabric. Closed simple shapes work best.
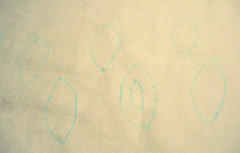 Leaves work well. I could see a cute sunflower too!
Cut a scrap of fabric slightly larger than your applique shape.
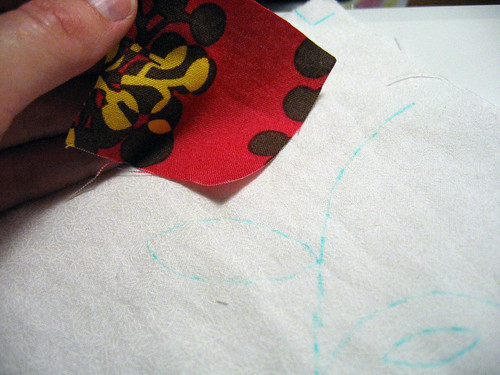
Place your applique fabric behind the backround fabric face up--that is, the right side of the applique fabric to the wrong side of the background fabric.
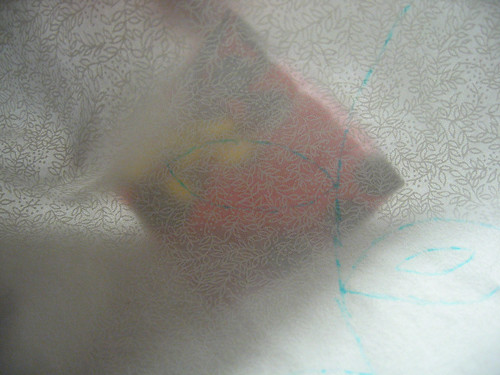
Set your machine to a narrow zigzag with a short length. Test your zigzag on a scrap fabric to make sure you have nice, somewhat dense stitching. From the right side of the backround fabric, follow your drawn line to stitch your two fabrics together. Leave the thread tails long.

Draw your thread tails to the back. Knot and trim tails.


This is the "correct" way. If you get lazy like me after doing a bunch, you'll probably find yourself clipping the tails, applying fray-check and hoping for the best! :)
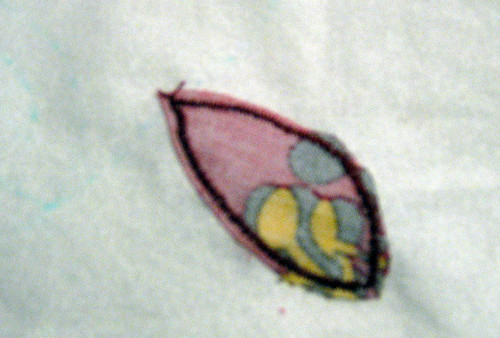
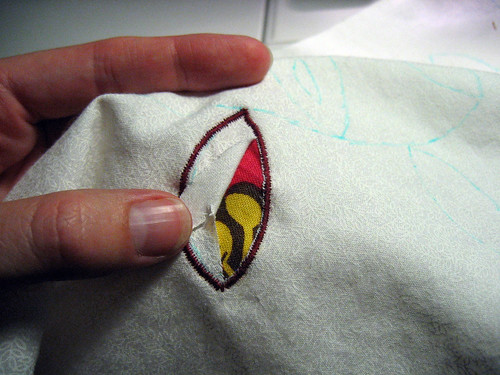
Trim the applique fabric close to the stitching line (but not too close!).
ooo, blurry! Sorry! Hopefully you get the idea...
From the right side of the background fabric, carefully cut the background fabric that is inside the applique without cutting the underlying applique fabric. This is where those small pointy scissors come in handy.
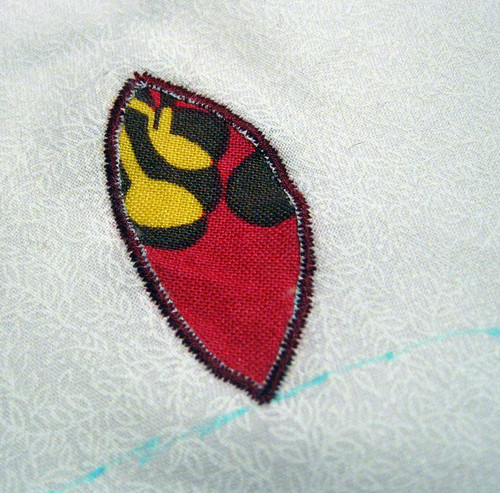
Ta-da!
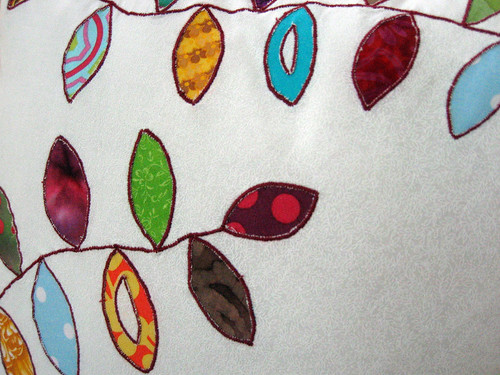
Repeat for the rest of your design, then add in any connecting stitching lines.
Finish you pillow as you see fit. There are a lot of other tutorials out there, depending on what you like. Here's a few that I found, provided without guarantees however:Button back pillow, Basic throw pillow tutorial, Zippered pillow.
(All I did was cut two pieces that were the same width as my front but 1/2 length + 3 in. Turn up a half inch then 2 inches and sew the hem. Lay these face down on the front then sew and turn. All done!)
Phew! Lovely work, now it's time to use that pretty pillow for some well deserved lounging!


Thanks soooo... much for the tutorial. I'm going to use this idea on my next mini wall quilt!
ReplyDeleteThanks so much for doing this! I love the way the technique comes out.. I'm going to have to try it..
ReplyDelete-dot
thanks a million :)
ReplyDeleteI have wondered the best way to do my first applique for 2 days before I visit here! I'll try it for my first mini quilt swap project.