Friday, May 30, 2008

Friday distractions - Tutorial MANIA!

Hi, my name is Kim and I'm a tutorial hoarder.

I've got mucho tutorials for uber cute things that I've stumbled upon and they sit idle in my bookmarks folder. But they are SOOOO cute I want more, more, MORE!

And yet, I think I've only actually made 1 thing from these tutorials. Sigh.

I feel I must spread the love, as some of these are way too cute to not be made and loved. Not many pics, as they belong to other people, but trust me--you'll love them!

Piggy Bank Wallet from Nosey Nest (crazy cute!)

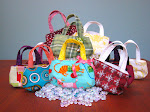
Fabric Basket from Pink Penguin

Knit Opera Gloves from Sweaterscapes (have I mentioned that I don't knit? But I REALLLLLY want these!)

Cereal Gift Boxes from Chrisjob via curbly

Christmas Pixies from Chickpea Sewing Studio (never to early to start!)

Soft Tree Pattern from Little Birds Handmade

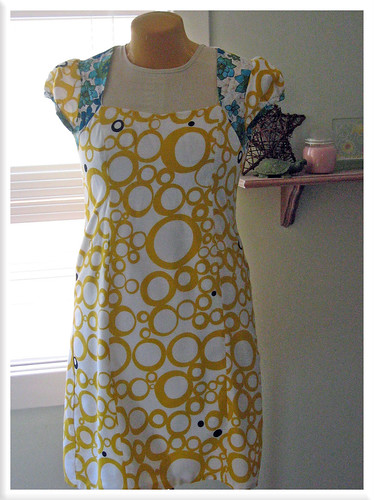
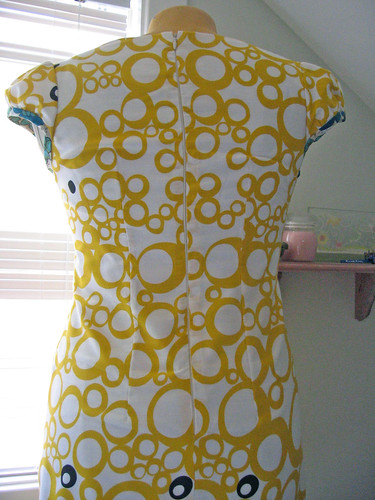
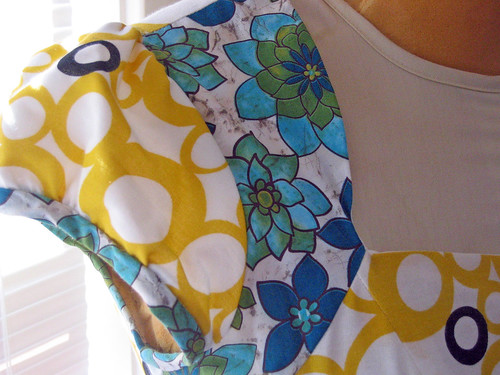
I'm a milkmaid? Summer time Dress by laurasaurus via Craftster (oooh, I forgot about this! I should make it...)

Stuffed Acorn from Old School Acres

Fabric Bucket from Ric Rac (love!)

Reversible journal cover from Kirin Notebook

Phew! I know there are more hidden in my bookmarks, but I keep getting distracted by all the cuteness!

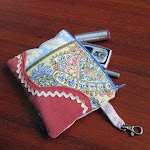
There is one more that I actually made. The Pleated and Darted Purse by U-handbag. (There are a bunch more tutorials there, too!)

I made this bag when I was a bridesmaid in my friend's wedding. We were charged with finding our own black shoes to coordinate with our champagne dresses. Evidently I'm ridiculously tall in the minds of David's Bridal designers, so I had to find flats that wouldn't look silly if they stuck out from under my dress. Long story (shopping trip) short, I found some champagne ballet flats with black lace overlay that matched perfectly!

bridesmaid dress and matching bag

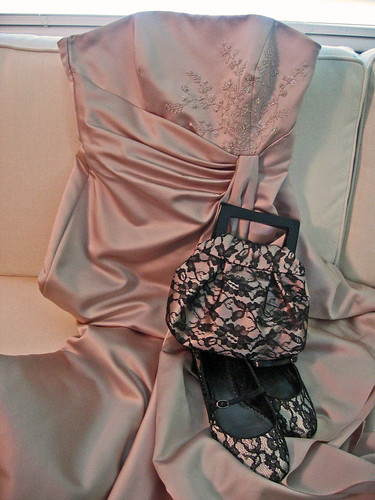
And that required a matching bag, of course:

bridesmaid bag

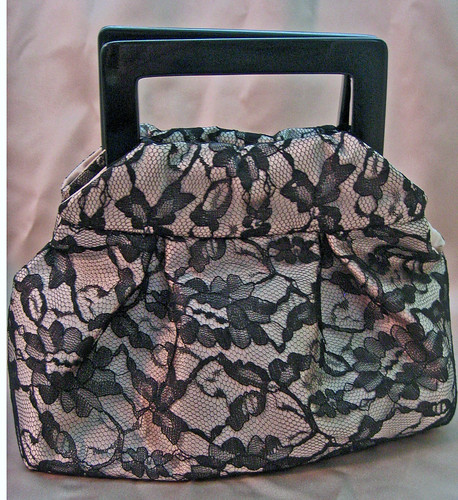
I used matching satin with black lace on top. I treated the two fabrics as one as I stitched the bag. The tutorial was very well written, by the way!

The addiction is itching again...Anyone have any more tutorials I can oogle?

Tuesday, May 27, 2008

Really Wrinkled?

Try this:

Asheville, NC

Wednesday, May 21, 2008

Pattern Review: Amy Butler Lotus Tunic

So way back when I was preparing for the previously mentioned Steeplechase I decided that I couldn't possibly wear an OLD dress to the sundress event of the season and thus decided I'd make one. Sure it's crazy to take on yet another project when I'm already super busy, but I'm also cheap (thrifty?) and didn't want to go spend >$100 for a dress I'd be wearing in a field (and while using a port-o-potty!)

I chose one of Amy Butler's patterns that I won in the contest as I knew it would be well written and likely to go together quickly. And I just thought the Lotus Tunic was cute!


I chose some REALLY cheap stash fabric as I wanted to make a wearable muslin (practice garment) first before cutting into some lovely AB fabric. I ran out of time and ended up wearing this dress. The main fabric is an IKEA quilt cover I got for $5.00 from their as-is bin. The contrast is a remnant from Jo-Ann's that I liked. I lined with plain white fabric I had on hand...may have previously been a bedsheet (shhhh!)

lotus tunic 1

So, what did I think of this pattern?

Options:
The Lotus Tunic also includes a cami and dress length option. Based on the "back of neck to hem" measurements on the envelope, the cami falls at hip length, the tunic a few inches above the knee, and the dress to mid calf--on me. I am 5'9", so I think the tunic would make a nice knee length dress for most women. I went with this length as I didn't want to risk an unattractive mid-calf length, but it ended up a mini-dress that was close to pushing my modestly limits. Next time I'll lengthen a few inches...

Sizing:
The sizing seemed pretty standard to me, but if you usually fall below or above department store s-m-l you might have to do some major alterations. My measurements fit into a medium perfectly for bust and hip, but my waist measurement was closer to a large. I ended up tracing the pattern on to other paper and drafting a merged size that was a medium everywhere but the waist. I didn't want the hourglass shape of the tunic to be all clingy and have a replay of the fiasco at the boy's best friend's wedding last year:
  • Crazy photographer: Aww, is there a reason he's rubbing your stomach?
  • Me*: No, you jerk! I'm just fat and bloated on cake and neglected to wear my scary stomach-holding in granny panties. Take that ridiculous faux pimp hat you stole from the weird DJ and take someone else's picture...
    • * May not have actually been said outside of my head

Whoa Nellie, back on track. Anyway, this change worked well on the side and back seams, but I took it out on the front panel as it made for some weird poochiness... Oh, and I cut the cap sleeves as a large as I was afraid of binding on my upper arms, which was also a wise decision.

Pattern:
The pattern pieces were nicely labeled, but printed on tissue like a commercial pattern rather than paper like most indie designers. I'm guessing this is because it is an apparel pattern, but I trace all my patterns on to other paper so I can make adjustments and still have the original to fall back on. Much easier with paper rather than tissue, but my only complaint.

Instructions:
The instructions were very easy to follow, in my opinion, especially if you have made a few garments before. It could easily be someone's first garment pattern, but they might want to allow extra time and make sure to read through EVERYTHING before starting. The mistakes I made were due to a lack of pre-reading, overconfidence in my abilities, and breaking my "no sewing after midnight" rule. I did have a few problem spots:
1. The first step is to put on belt loops and make a belt. What? I didn't even see a belt on the envelope...Totally just left that out as I'm not a belt person anyway. May have been good to label this "optional".
2. I put in an invisible zipper, which was easy even without an invisible zipper foot. Mine did turn out kinda puckery and not as neat as I would have liked, but I think that was a combo of thin fabric and no invisible zipper foot.

lotus tunic 3
3. At one point it says to turn dress inside of lining. The next step talks about sewing the armhole together and specifies that it should be wrong sides together. The turning step didn't say that, so of course I put it right sides together and started sewing. I was almost done before I realized it would be impossible to put my arm through the armhole I had just sewn...
4. The binding on the cap sleeves is stitch-in-the-ditch like you would bind a quilt. Easy in theory, tricky in practice. I'm not a quilter, so one arm looks good, the other not so much. I'll only show you the good arm! :)

lotus tunic 2

All in all, it is cute styling and I'll make more. I'll make the tunic longer for a real dress, or shorter for a real tunic. And fine tune the sizing, as that's the best part about making your own clothes!

I'd say that advanced beginners or intermediate sewers would be fine with this pattern. Do as I say, not as I do and read through before beginning and you'll be golden.

Oh, and of course I had to dress up my hat for Steeplechase. It's not a horse race without a hat! I made fabric flowers from the Anna Tunic (also by Amy Butler) and pinned them to the hat.

lotus tunic 4

So cute!

lotus tunic 5

Monday, May 19, 2008

Urban Organic

Well, I survived the grilling by the scientific elders and won't have to sell my soul to appease the science gods. Now I can get back to my regularly scheduled blogging and sewing and crafting and not being a brat to live with shortly....

I've got some craft blog posts coming up soon, but in the meantime I thought I'd share some pics of our little organic farm we've got here. The boy has worked so hard and it's really coming together. Not enough to live off (yet?) but it will definitely help supplement our summer produce. Mmmmm, fresh blueberries!

Garden 1

Click the pic to go on over to flickr and see labels of what we're growing.

Last year TN (and much of the southeast) suffered a nasty drought and our water bill was outrageous. We've recovered our rainfall total recently, but the boy and I were thinking of ways to circumvent this for the summer. We saw these rain barrels at the Earth Day festival and decided to buy one instead of making it ourselves at it benefited the Watershed Alliance...oh, and because the boy is as bad as me about having WAY too many projects to finish and this was one he didn't mind giving up.

One good rainfall fills it up as it collects from gutters on about half our roof. Should hold enough to water the garden for a week in the summer I'm guessing!

Rain Barrel

Now that the backyard is coming along, I suppose it's time I hold up my end of the deal and get to work on the front before our neighbors pull a landscaping intervention....

Friday, May 16, 2008

No Friday Distractions--PLEASE!!!

Eeek! I've got a Huge HUGE uber important ridiculously stressful presentation to give on Monday which requires me to be an expert on everything and convince a bunch of my scientific elders that I actually know what I'm talking about and that they should be nice to me....

Anyway, that's why my postings have been so few and far between as of late. I'm putting in long hours at work and yes, I'm STILL working on the Tremendous Totes. The pattern is almost done too, I promise! :)

Hope you all have a more relaxing weekend than me. Do something crafty for me, as I'll be chained to the computer and pile o' papers while my sewing machine gets dusty!

Monday, May 12, 2008

Steeplechase Red Velvet Cake Balls

This past Saturday was the annual Iroquois Steeplechase here in N-ville. Somewhat of our answer to the Derby, it's a day for wearing cute dresses and hats (more on that later), tailgating with friends, and watching some magnificent animals.

This year, I was "volunteered" to bring desserts to our tailgate party. I already knew that I wouldn't be allowed to show up without the cookies, but I was at a loss at what else to bring. I'm a glutton for punishment, so it had to be something fun, yummy, impressive, and able to stand being made the night before then punished by sitting out all day. And that's when I discovered cake balls...

The original recipe is here. Super cute and super easy, I've documented my experience (plus my extra special customization, of course) for you all.

Step 1: Bake a box of red velvet cake mix in a 9x13 pan and let cool.


Step 2: Crumble your beautiful cake into a big bowl.


Step 3: Mix one can of cream cheese FROSTING into your crumbled cake. Don't use whipped frosting, just the regular stuff. This can get messy. Halfway through I was wishing I had a 6 year old in a smock--they'd get a kick out of this project!


Step 4: Roll your cake/frosting mixture into balls. Mine started out quarter sized then grew as I got bored with rolling. And having red hands. Again, the small child would have come in handy here. Chill your balls (!) in the fridge for a few hours.


Step 5: Melt a few bricks of bark coating in the microwave--follow the package directions. Roll each ball in the bark coating then drop on to wax paper. If you feel inclined, decorate with sprinkles now before the coating sets. I used green sugar; the reason for this will become apparent in the next step!

TIP-The red velvet cake does eventually pollute your nice white bark coating. I used small batches and got a new bowl each time as water will destroy the coating. The end of each small batch usually resulted in at least one "ugly" ball, so that was set aside for placating the kitchen invaders/myself.


Step 6: Ever the one to carry a theme, I melted some chocolate and made little horseshoes on top of each ball. Too cute! And tooooo yummy--I'm in red velvet overload!

Sunday, May 11, 2008

Wednesday, May 7, 2008

Tick Tock, Tick Tock

Ever have those weeks (months?) when everything you do takes WAY longer than it should and then there is even MORE stuff to do that should have been done in the time you were trying to finish the last thing?

Yeah.

Never fear, I'll be back shortly...

Thursday, May 1, 2008

Online fabric stores

I'm a stickler for fabric matching. Hence why, despite buying everything else online, I shop for fabric mostly at brick and mortar stores. You can't capture correct colors in a photograph for the web, I've found. HOWEVER, if you know what you want or just want to build your stash with cute things that you'll match up later, online stores are the best. Even with rising shipping prices, those online stores don't have to pass on their overhead to you and you end up with a slightly lower price per yard. No free advice or oohing and ahhing over your latest project like in the stores, but awesome when you want to shop for fabric in your pajamas.

Now where oh where would you shop online for fabric? Read on, read on....

Fabric.com - by far one of the best organized online fabric stores. Great for when you are looking for something specific (Amy Butler fabric, anyone?). However, colors in their photos are notoriously off--at least on my computer. But they have a fantastic, no questions asked return policy complete with free return shipping if you are way surprised by how something looks when its arrives. Sign up for their email list to get coupons and sale announcements.


Buyfabrics.com - crazy extensive collection of home dec fabric. Some brand names, but easier to browse when you have a color scheme or general idea of what you want than a specific fabric need. I haven't ordered from them, but I've heard good things.


Reprodepot fabrics - a favorite for super cute fabrics--retro/vintage, designer, imported, etc. The fabrics they showcase aren't cheap, but their prices are competitive. I missed out on the Marimekko sale, which is a huge bummer! Definitely great for those unusual things you can't find anywhere else.


Textile Arts - I admit I've only browsed here, never bought, but they have a lovely collection of Marimekko eye candy. I so should live in Scandinavia.


Thousands of bolts and only one nut - Mom turned me on to this one. Prices are definitely VERY cheap, but you have to just pick a color and browse through. Maybe you'll find a gem!


Robey's Fabrics - I haven't browsed their fabric site much, but I do know that their companion site has some great deals on pillow forms, especially the odd sizes that you can't find at JoAnn's.


And if you want your shopping to be greener:

NearSea Naturals
- enviable selection of organic fabrics, including cotton. hemp, wool, and blends. I'm a sucker for the colorgrown cotton. Such pretty colors and not a drop of dye! Going green isn't cheap, but they offer nice volume discounts if you have the capital (or a lot of friends).


PM organics - lovely selection of knit and woven organic fabrics.


Anyone have any other online fabric shopping gems?