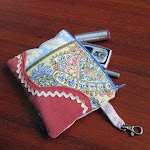
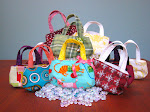
I went and got myself a flickr group!
If you make something from a pattern or tutorial and want to show it off, feel free to add it to the group. I'm excited to see what you have made!
Showing posts with label sewing projects. Show all posts
Showing posts with label sewing projects. Show all posts
Thursday, March 17, 2011
Sew it, share it


Thursday, September 23, 2010
The pillow says "meow" (tutorial)
Nothing says cuddly like a kitty on the couch, even if that kitty is a pillow!
I drew up a diagram so you can make one of these too! Actually, there are a lot of ways you could use this diagram to make this pillow (painting, stenciling, reverse applique, regular applique, silkscreen, etc.) So if you have an idea, download either the regular or reverse diagram (sized for an 18 inch square pillow) and have at it! If you want to make one like mine, keep on reading for both a sew and no-sew version...
Cat pillow diagram
Cat pillow diagram REVERSE
Applique Cat Pillow (Sewing Version)
Supplies:
18 inch pillow form
Fabric:
3/4 yard for background
1/2 yard (or a piece at least 15 inches x 20 inches) for cat
1/4 yard (or a piece at least 4 inches by 12 inches) for letters
fabric as necessary to finish back, make piping, etc. (will vary based on how you finish the pillow)
Supplies:
Sewable Iron-on adhesive (I used HeatnBond Lite)
Coordinating thread
Closures for pillow as desired (buttons, zipper, etc)
Printer, tape, and a pencil
1) Cut 19 inch square from front background fabric.
2) Print out the cat pillow diagram REVERSE. The final pillow is 18 inches square, so you will have to print in sections and tape together. Every printer is different, but you will probably have to set "page scaling" at zero, select "tile pages," and set an overlap, such as 1/2 inch. (If you have troubles, send me a message and I'll try to talk you through it!)
3) Trace the cat onto the paper side of the iron-on adhesive. Cut out leaving a wide border around pencil lines. Repeat for each letter.
4) Place the traced cat iron-on adhesive on the WRONG side of fabric for cat. Press with iron to activate adhesive as directed on package. (from my package: silk setting, 1-2 seconds) Let cool, and then cut out cat fabric on pencil line.
5) Remove paper from cat iron-on. Using diagram as a guide, place cat iron-on on background fabric. Press iron to adhere as directed on package.
6) Using a small, narrow zigzag stitch, sew around entire applique to seal edges.
7) Repeat steps 4-6 for the letters.
8) Finish the pillow as desired. I listed a few tutorials here. If you want a book, I recommended this oldie but goodie. I finished mine with piping, an overlap and buttons, but you could use a zipper or even sew the entire pillow closed.
Applique Cat Pillow (No-Sew Version)
Fabric:
1/2 yard (or a piece at least 15 inches x 20 inches) for cat
1/4 yard (or a piece at least 4 inches by 12 inches) for letters
Supplies:
Finished 18 inch pillow with removable form (check that the fabric is able to be ironed at medium heat)
No-Sew Iron-on Adhesive (I like HeatnBond Ultra)
1) Remove form from pillow.
2) Follow steps 2-5 above to print out diagram, trace cat on to iron-on adhesive, attach iron-on adhesive to fabric, and then attach cat iron-on to pillow case. Repeat with letters.
2) Reinsert form. Done!


Wednesday, September 8, 2010
Registry Schmedistry
While I haven't done a formal study of this topic, I'd be willing to bet that if you were to query my friends and family, they would unanimously label me as "the one who never buys our registries." Is that bad? Is there a special sort of hatred that is saved for gift-givers like me that ignore the registry? What if I promise to never ever buy something random that you will probably have to return but instead make you something (that will probably live in the closet until come to visit)?
So...? Am I still invited to the party? It's the thought that counts, right?
I don't have anything against registries, in theory. I think they are useful for people that want to give a gift but want to ensure the receiver loves it. Personally I find it a bit weird to tell people what to buy me, but the word on the street is that regstries=good. Yet when I'm putting together a gift, all the registry says to me is...BORING! Buying sheets for my dear friend's wedding shower? Uh, skeevy. Baby wipes? Not cute (Useful, yes. But not cute). And watching said registry gifts be unwrapped at a party? Hello, I already know what you were getting because I looked at your registry! (but thanks for inviting me, the cupcakes are fab...)
So this brings me back to the dilemma I faced for a friend's bridal shower. I know she needs a lot of the things on her registry as she and her fiance have just finished school. I had resigned myself to buying a few things off the registry but I really wanted to make her something that would make her say "aww, Kimmy made this for me" whenever she saw it. Narcissistic? Maybe. But that is neither here nor there...
Fortunately for me, there was a little note tucked in the shower invitation that highlighted some of my friend's favorite things and decor selections. A few popped out at me as inspiration--cats, black and red--and this is what came of it:

Cute, no? I liked it so much I made one for myself:

You want one too, you say? Hang tight, my dears, it's coming soon!
Tuesday, August 3, 2010
Pattern Review: Amy Butler Sophia Bag
Last year, when my mother was visiting, we were looking through my patterns in preparation for our annual fabric shopping extravaganza. She took one look at the Amy Butler Sophia pattern and said "That's my Christmas present from you!"
We went shopping and picked out fabric for her bag and for mine. I made mine first to try out the pattern. Her bag did not get finished for Christmas, so it became a Mother's Day gift...not really. I FINALLY gave her the bag this week as a "because you are wonderful and being here on vacation means I save on postage" present. She loved it all the same. And now that the bag is in her hands I can share my review of the Amy Butler Sophia pattern!
My bag is on the left; my mom's is on the right.
1) Like all Amy Butler patterns, this one is easy to follow. I had done piping before so I didn't have much problem with that. Frankly I didn't really follow the directions at all because I hardly ever do--there are only so many ways to assemble a purse! I really only looked at them for the zipper, which brings me to point number 2.
2) The pattern called for a "purse zipper"--two pulls that move outward from the center. My fabric store only had Coats purse zippers in black and an ugly brown. Um, no. For my bag (which I made first) I just got one long zipper:
This worked fine, but is kind of a pain when you want to get into the bag. You have to open the WHOLE bag just to get in, and it's a long way around. Not too speedy.
For my mom's, I wanted to preserve the center opening so I got smarter. Instead of one 22 inch purse zipper, I got two 11 inch regular sport zippers.
The only tricky part was keeping the zipper tape out of the way at the top. I ended up tucking them back and basting and then covering with the bag lining. This way the pulls would be close together like a purse zipper but I got the color I wanted! I also put on some pretty beads as zipper pulls after I took this picture, which really classed up the whole bag.
3) I had to do some fiddling with the lining to get it to work. For my bag I followed the instructions and sewed together the whole lining and stuffed it into the outer bag. While I was careful with my sewing, all the layers and piping of the outer bag made it a bit smaller than the lining (plus there was no accommidation for the turn of cloth. Thus my lining is too large. I went ahead and sewed it in around the zipper, but the false bottom covers a big wrinkle of extra fabric and my pockets go down onto the bottom of the bag. One day I will get around to fixing that.
For my mom's bag, I sewed the top zipper flaps to the sides of the lining. Then I put this in the outer bag and pinned in place. I marked where the bottom seam was and used this line to attach the bottom (which I also resized to match the bottom of the outer bag). No saggy lining on hers!
This also brings me to another point. I made her pockets like the pattern and they turned out cute:
I added some of the extra piping to the top of my pockets, and I like the contrast. However, the weight of the piping makes my pockets a bit saggy. Just a warning if you go that direction.
Judging my my mom's reaction, the Sophia bag is a success! I would definitely say that an ambitious beginner or intermediate sewer should have no problem with this pattern.


Thursday, July 8, 2010
Quicker that driving to Hallmark
This weekend I realized that today is the birthday of a dear friend (and the day before my birthday, hint hint!). I needed to get a card in the mail pronto, and I usually keep a stock of birthday cards on hand for just such emergencies. However, my supply was fresh out which left me with two options:
1) Get in the car, drive to Hallmark, look at eleventy-seven-million cards trying to find one that is cute but appropriate, look at a few more cards for giggles, pay way more than I think a stupid card is worth, drive home...
2) Make something.
Since this friend is the queen of scrapbooking and always makes adorable cards for every major (and a few minor) card-sending holiday, I felt like she deserved something special. I don't scrapbook, so there is no cute paper in my house, but I have plenty of cute fabric!
This is what I came up with:
Cute, right? Here's how you can make one.
Supplies:
Cardstock
Envelope (I save envelopes from unused invitations and such. Very handy)
Fabric scraps
Fabric cutting scissors/rotary cutter with mat
Paper cutting scissors (paper will dull your good fabric scissors, so I keep a separate pair for paper, etc.)
Thread
Used, but not abused, sewing needle (after I finish a sewing project, I put the needle in a case marked "used, for paper." They might be too dull for fabric, but still have some life left in them. Don't use a needle you used on paper for a fabric project--see above regarding paper scissors)
How-to:
Cut two pieces of cardstock to fit in your envelope. Mine ended up being 4.5"x6"
Select fabric scraps and trim into pleasing shapes, layering on a cutting mat if possible.
Note: I had to select from my "cool" stash of scraps as the "warm" stash was occupied.
Trim your fabric to about 1/2" larger than your cardstock (so mine was 5"x6.5"). This is easier with a cutting mat and rotary cutter, and is only really necessary to get some of the excess out of your way.
Center one piece of cardstock under your fabric and sew the layers together with zigzag, buttonhole, or other decorative stitches. Try to start from the center/bottom layers and work your way up and out.
Add embellishments, etc. I stamped "Happy Birthday" on another fabric scrap and attached it in the middle.
Trim fabric to the size of the cardstock. Place the other piece of cardstock on the back of the first one and attach with a narrow zigzag or buttonhole stitch around the edge. This will give you a nice clean surface to write your message.
Tada! Totally quicker than driving to buy a card, and so much cuter.


Friday, June 11, 2010
Afternoon with Alabama Chanin
On May 2, I was looking foward to spending an afternoon with Natalie Chanin, author of the Alabama Stich Book and Alabama Studio Style at my fave fabric shop. Unfortunately, other more pressing matters got in the way and the class was cancelled.
Fortunately, Natalie agreed to make another trip to Nashville and I got to go to my class afterall!
Natalie, who is positively delightful, gave us tips on her signature techniques. The time flew by as we sewed and listened to her stories.
My tee is still a work in progress, but there is something so cathartic about sewing by hand. Me, on the porch, with iced tea, sewing? Yes, please! Stay tuned for the finished product...

Wednesday, May 26, 2010
Cute overload
Have you ever made something so cute that it causes you to squeal "ohmygoodnessthatissoooocuteeeee!!!!" (and then look around to see if anyone heard)?
Yeah, that's how I felt after I made these:
Ridiculous. It kills me.
And of course, you need pants to go with your fancy shirt/tie combo:
And shoes:
Baby showers rock--All of the cuteness, none of the poopey diapers!
(both pants and booties from Amy Butler's Little Stitches for Little Ones Oooh, bargain price right now! Snatch this up!)


Sunday, March 7, 2010
A Tremendous comeback
Been a long time since we've seen the old Tremendous Tote, huh? Well, that girl is neither gone nor forgotten. A lovely customer with good taste commissioned a custom Tremendous Tote, and it turned out fabulously. See for yourself:
Front
Back
My customer wanted to feature the main fabric (Amy Butler Lotus Blossom) but jazz it up a bit. We came up with this stripe solution which looks really sharp.
Top
Turning the stripe fabric on the bias made for some really cool diagonal stripes on the trim and piping.
Inside
While the custom option is not for the faint of heart (or those in a hurry), there are still original "Georgia Peach" versions available in my etsy store.


Saturday, January 30, 2010
Start 'em off right
A dear friend of mine from high school went off to college at Purdue U. There she learned, made friends, and went to a lot of rowdy football games. She also met her now husband there as well, and together they kept up their tradition of going to football games and other Purdue events together.
Now my dear friend and her loving hubby are just days away from welcoming their first baby boy. When I heard the news, I knew just what this fan-in-training needed:
I used the pattern from Amy Butler's Little Stitches for Little Ones to make these adorable booties.
Eeeeee! Can you stand the cuteness?
The hooded blanket is also from the same book. The pattern has the middle tie going through some button holes in the center, but I left those off. I figured having the tie around all the time would be a safety hazard as the kid got bigger, but with a regular blanket he can drag it around however he sees fit.
I also added some quilting to help all the layers stay together and make it more durable. I just followed in the pattern on the printed side, which made the stitches disappear on that side with the added benefit of this awesome pattern on the fleece.
Now hurry up and get here, baby! I can't wait to see you all bundled up in your fan gear!


Monday, September 14, 2009
Sneak peak
I took my newest design out for a little field testing this weekend.

I love the flirty ruffles. They give off such a playful beachy feeling.

This bag also gave me a chance to use some of the pretty Amy Butler Midwest Modern fabric hanging out in my stash. Slowly but surely I'm working through the stash, I promise. Just don't ask what the UPS driver is delivering...!

Based on the reaction of "people on the street," I think this design is a winner. What do you think? Should I fast track pattern writing for this pretty little number?

Thursday, February 12, 2009
Pattern Review: Amy Butler Frency Bag
In the Christmas rush, I found myself needing one more gift but short on time and ideas, as usual. I dug through my stash of fabric and found something I knew the recipient would love (she a total cat nut) and decided to forgo designing a bag and grabbed my Amy Butler Frenchy Bag pattern. Yes it was dangerous to try something new with no backup plan, but it's Amy Butler so it was practically guaranteed...
The result?

Love it!
I loved it so much that I whipped up another one a few weeks ago to take on a work trip, and it worked out beautifully (forgive the horrid bathroom mirror photo, please!)

So now it's time for the good, the bad, and the mistakes that I hope you can learn from:
What I liked:
- Um, it was easy. I would totally recommend this one as a first timer bag if you can handle a challenge/have a good teacher. Or if you are feeling lazy and want something cute with minimal effort.
- Pockets! I didn't even know there were pockets inside until I started cutting out, but I did end up making a small change (more on that later).
- There are two bag size options, and two handle lengths. I mixed them up a bit, making the small handbag size with long straps for the gift, and the larger bag for myself. I like a big bag (obviously) but not everyone does, so that's a plus.
What I don't know if I like:
- The layout. I totally didn't follow the cutting layout at all because I wanted the interior pockets to be made of the exterior fabric (because I like a bit of cuteness when I look into my bag). So I ignored the cutting layout and just made my own to best utilize my fabric. Therefore I also have no idea if the amounts specified on the pattern are reasonable.
What I didn't like/what I changed:
- I didn't have any sew-in interfacing, so I used fusible. I actually didn't like that so much, so I'd do something different next time (more on that later).
- I sewed a vertical dividing line in the pockets because the are rather large and seemed a bit floppy. Worked out wonderfully and I'd highly recommend it!
- On the bag I made for myself I was using a one-way design and didn't want the birds to be upside down on half of the strap. Instead of cutting them on the fold, I cut the two pieces separately and sewed a seam at the middle so everyone is right side up!
- The last step has you doing some weird topstitching on top of topstitching to keep the lining inside of the bag and not flopping out. This is necessary, but I didn't like the idea of sewing another line on top of a previous one as I knew there was no way I could be that precise and it would look messy.
Instead, I did a littel "stitch-in-the-ditch" on the side seams and augmented with a tiny bit of topstitching on the top panel behind the straps, so it would be hidden when carried:

What I wish I'd done differently:
- Interfacing! I don't really recommend a fusible like I did. Didn't really have the effect I wanted, but it's okay. Personally I don't like really stiff bags, so I would probably go with a sew-in that wasn't too heavy for the body, but the top needs something more.
- Top reinforcement is a top priority (heehee)! The fusible interfacing just didn't cut it. My top is a bit saggy when I carry it, and doesn't really stand up to the magnetic clasp. I'd probably use a mid-weight sew in on both the exterior and "lining" sides of the top (so cut 4 of interfacing instead of 2) to give it the boost it needs.
- Move the magnetic clasp. The pattern has you putting the magnetic clasp right over the seam between the top and bag. That's all well and good, but causes the conflicts with topstitching that bothered me so much. With a reinforced top, you could move the clasp up to the middle of the top part and then have plenty of room for topstitching the exterior and lining together.
- Keeping it all together with topstitching. My mods have worked fine, but ideally I'd want to put a line of topstitching on the top part of the bag right above the seam. Moving the magnetic clasp would mean you don't have to stop your stitching line and leave an unsightly gap in the topstitching.
Clear as mud?
Anyway, this pattern is great if you follow the directions even if I didn't. If you want to make it even better, I encourage you to play with it a bit and I think you will be pleased with the results!
Happy sewing!
Best,
Kim
Wednesday, November 5, 2008
My first free motion quilting attempt
The dilemma:
The oh so pretty food dehydrator. It lives on a table in the corner of the dining room because there is no other place that it will fit! But not to appetizing during dinner.
The idea:
Create a cover for said appliance. However, I didn't want to do something fitted in case, by miracles of miracles, we find another place for the dehydrator to rest its weary head. Sooo....
The result:
A square quilt of sorts to (sort of) hide the dehydrator but still is able to act as a table centerpiece thingy. Cool.
The method:
I made a valiant effort at free motion quilting in a "bubbles" design.
Um, yeah, it's harder than it looks. But fun. So I'll give it another go, as I'm sure it'll be easier once I get my long promised sewing cabinet! (Soon, hopefully!).
I edged it with one of the decorative stitches on my machine. Cuteness...
And one more for those who like staging:


Tuesday, October 28, 2008
Coralling the drop zone.
The dreaded drop zone. Ugh.
A never ending pile of papers, shoes, grocery lists, keys, cellphones... They accumulate by the door until you need them and then they have magically vanished to some yet undiscovered place in the house. Which means an additional search before you are actually out the door.
We enter through our back door the majority of the time (seeing that the driveway is out back and all..). Not so conveniently, this door opens right into the kitchen. Which means our little rolling island, originally intended as additional usable counter space ended up a catch-all for all sorts of unthinkable pocket debris. Finally, I decided to wrangle our drop zone into order and made this:
A handy dandy drop zone organizer! I specifically designed this to handle what we needed. We had already been using the bulletin board with hooks for keys, so I build from that. Small pockets for coupons, stamps, and shoppers cards. A dedicated pen pocket and a place for scratch paper (an absolute necessity for shopping lists or we will forget everything we need and come home with Cheez-its).
The big pocket on the bottom is for the boy's wallet and phone, as he is always (always) laying them somewhere else and can't find them.
And it fits nicely next to the fridge while keeping random stuff off food prep surfaces (such a pet peeve!)
Most people stage with pretty fruity like green apples, oranges or lemons. However, we are lousy with sweet potatoes right now so that's what ya' get! :)
Hey, did you notice my new red walls?!? Finally got the kitchen painted, hurrah! More pics to follow when we get everything else back in order...


Subscribe to:
Posts (Atom)


 Posts
Posts